Silverfort identity protection can be extended to Beyond Identity environments to provide additional benefits. This requires integrations between your self-hosted Silverfort deployment and the cloud-based Beyond Identity environments that you wish to cover.
Configure Beyond Identity
Log in to the Beyond Identity admin portal
Click Integrations from the navigation menu
Click the SAML tab
Click Add SAML Connection
Single sign-on URL: Enter your Mobile Messaging Service URL with the addition of the following prefix:
/apps/api/sso/responseSP Audience URI: Enter the SAML Entity ID for your application.
Requirements: To ensure a successful authentication, the SP Audience URI value must match the Audience
Restriction value set in Silverfort:
Name ID Format: Select
emailAddressfrom the dropdown.Subject User Attribute: Select
emailfrom the dropdown.Request Binding: Select
http postfrom the dropdown.Authentication Context Class: Select
Passwordfrom the dropdown.Signed Response: Enable
SignedAttribute Statements: Create two attribute statements containing the following:
Attribute 1
Name:
http://schemas.xmlsoap.org/ws/2005/05/identity/claims/emailaddressName Format:
uriValue:
{{email}}
Attribute 2
Name:
http://schemas.xmlsoap.org/ws/2005/05/identity/claims/nameName Format:
uriValue:
{{email}}
Click Save Changes
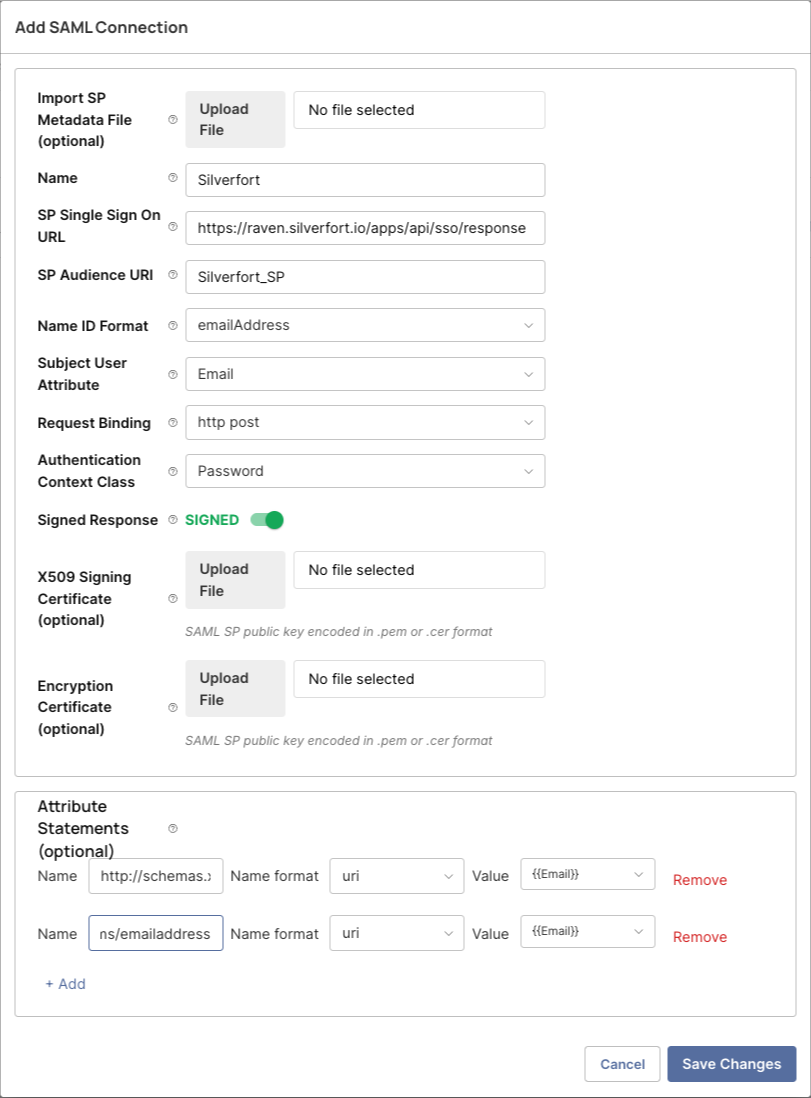
Overview of the Silverfort configuration in Beyond Identity.
Configure Silverfort
Log in to the Silverfort Admin Console and navigate to Settings » Integrations.
Select the Identity Bridge tab.
Navigate to the bottom and select + Add new IdP, then enter the following teails:
IdP Name: Beyond Identity
Application Name: Beyond_Identity App
Login URL: The IdP SSO URL copidd from Beyond Identity
Audience: The same value set for SP Audience URI in Beyond Identity (e.g. Silverfort_SP)
Upload Certificate: The certificate downloaded from Beyond Identity.
You can copy / download the values for IdP SSO, IdP issuer and the certificate from Beyond Identity in the Integrations page in the Beyond Identity admin console.
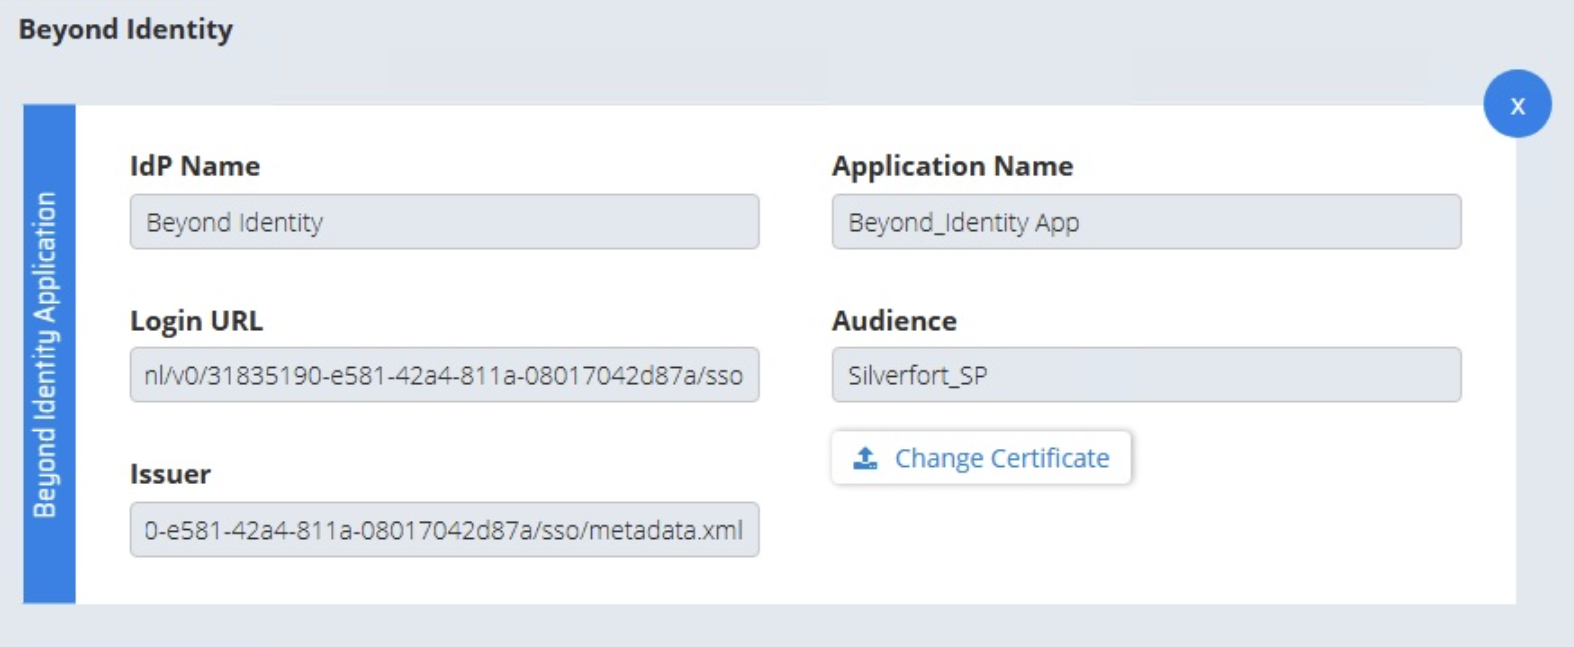
Configuration of the Silverfort Identity Bridge
Create a Bridge Policy
In the Silverfort Admin Console, navigate to the Policies page.
Select Create policy
Policy name: Create a name for the policy
Action: Select Identity Bridge
IdP: Select Beyond Identity
Enterprise App: Select the application name you entered in the Bridge configuration (e.g. Beyond_Identity app)
Click Save
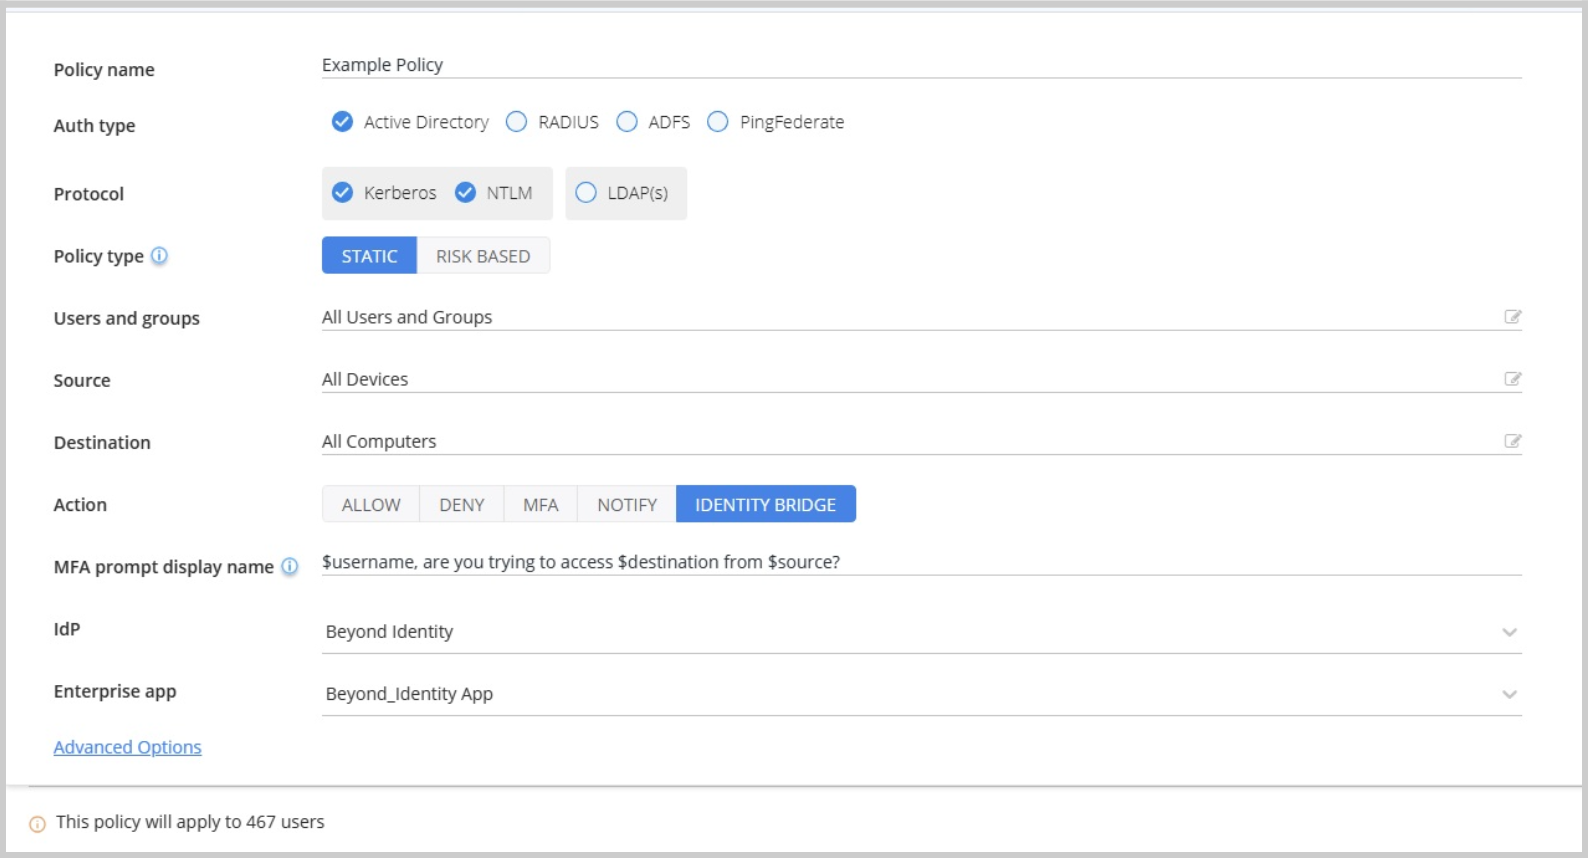
Silverfort Bridge Policy configuration