Introduction
This guide provides information on how to:
Set up Beyond Identity as a trusted IDP for your OptimalIDM environment.
Set up Beyond Identity Admin console as a service provider in Optimall IDM.
Set up SCIM user provisioning of members of a specific group in Optimal IDM.
Prerequisites
Ensure that you have the following:
A OptimalIDM cloud version with Gold plan.
A OptimalIDM account with “Superadmin” privileges.
Beyond Identity Configuration
Information to provide to the Beyond Identity Field Team:
Your Company Name | |
Your OptimalIDM Instance URL e.g. https://[your-domain].theoptimalcloud.com | |
Beyond Identity Admin Console Application credentials SSO Client Id SSO Client Secret | |
Beyond Identity User Console Application credentials SSO Client Id SSO Client Secret | This will be updated by the customer directly using the Beyond Identity Admin Console. |
(Optional) A logo for your corporation Logo requirements: 300 x 150 pixels or less File size of 10kb or less File types accepted: SVG, PNG, JPG, or GIF |
Information you will receive from the Beyond Identity Field Team
Beyond Identity IdP endpoint URLs: Issuer Authorization endpoint Token endpoint Userinfo endpoint | https://auth.byndid.com/v2/authorize |
Client ID | [From Beyond Identity Console] |
Client Secret | [From Beyond Identity Console] |
SCIM API Bearer Token | [From Beyond Identity SE] |
Beyond Identity Org ID | [From Beyond Identity SE] |
SCIM API endpoint |
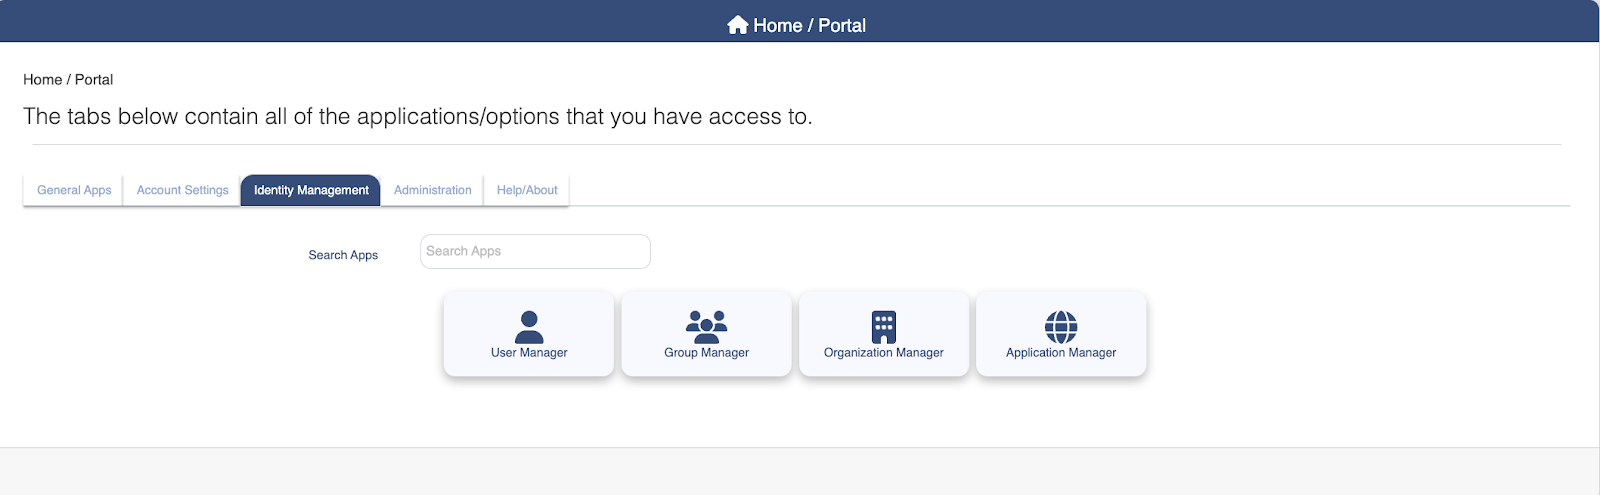
OptimalIDM Configuration
Step 1: Setup Beyond Identity as a SAML IDP
This requires the following
Setup SAML connection in BI
Setup SAML IDP in OptimalIDM
Setup Authentication Policy in OptimalIDM to use SAML IDP
Step 1.1: Setup SAML connection in BI
Access BI admin console as a superadmin. Navigate to Integrations > SAML. Click ADD SAML Connection
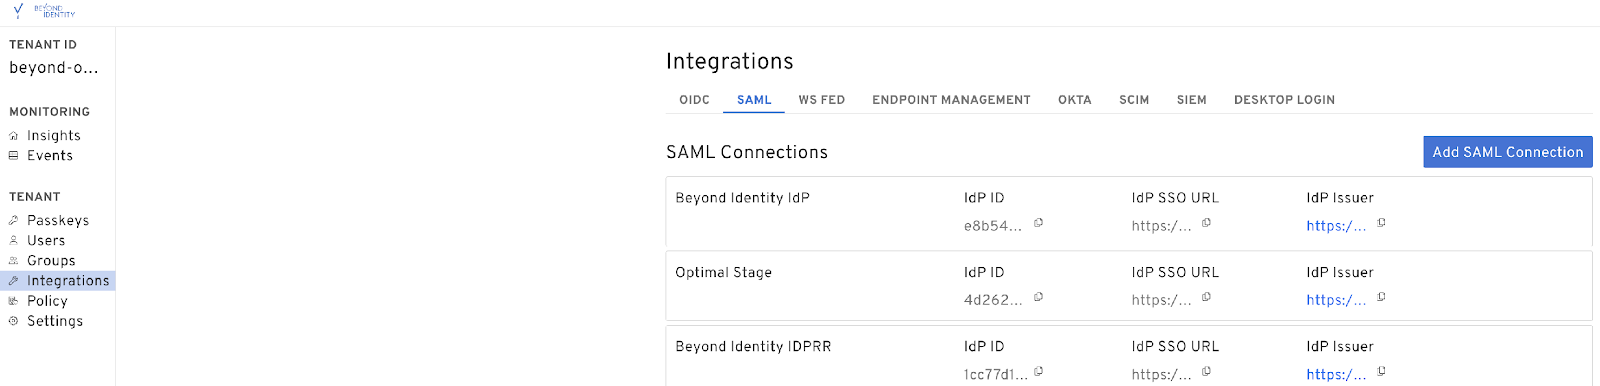
In Add SAML Connection screen
Type in a Name, for example Beyond Identity IdP
Type https://[your_tenant_id].theoptimalcloud.com/v5.0/saml2/ as SP Single Sign On URL
Type https://[your_tenant_id].theoptimalcloud.com/v5.0 as SP Audience URI
Type Email as Subject User Attribute
Choose http post as Request Binding
Click Save Changes
Copy IDP ID in the next screen. The metadata URL that is used to configure SAML IDP in optimalIDM will be https://auth.byndid.com/saml/v0/IDP_ID/sso/metadata.xml


Step 1.2: Setup SAML IDP in OptimalIDM
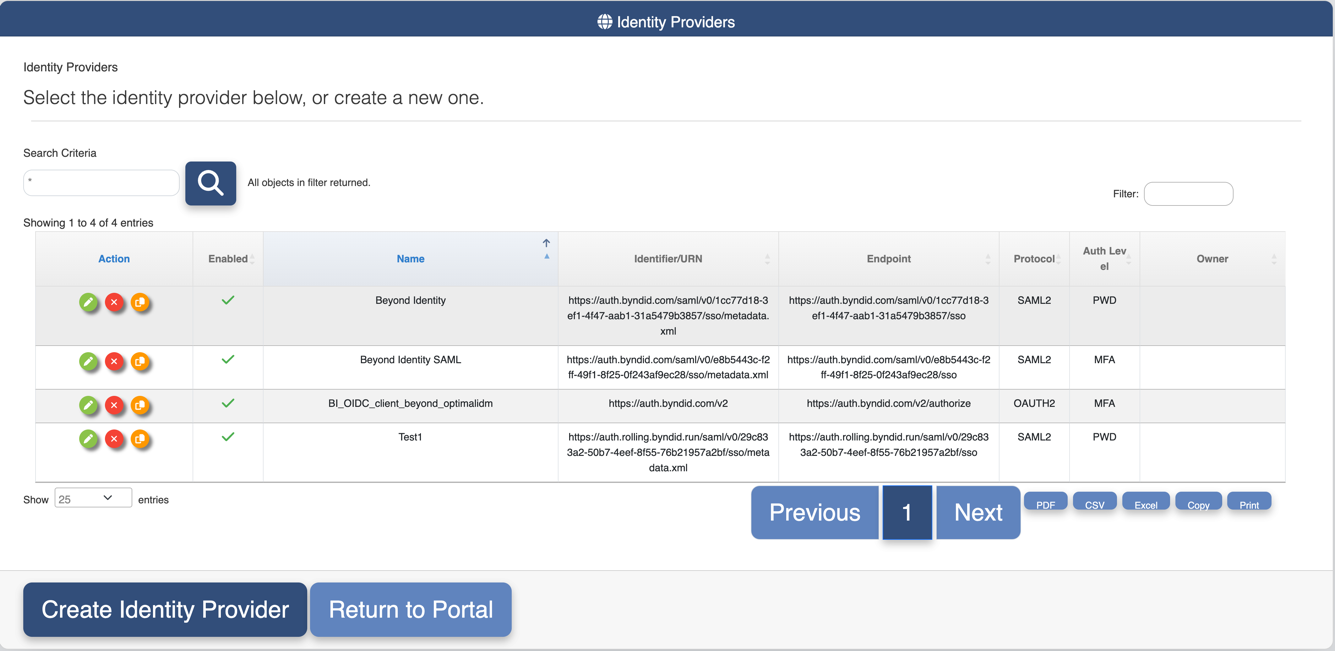
Login to your optimalIDM tenant as a tenant admin. Click on Identity Providers tab
In Identity Providers screen, click Create Identity Provider
In New Federated Identity Provider Wizard screen, under Step 1, select Create from Metadata URL and click Next

In New Federated Identity Provider Wizard screen, under Step 2
Type in an Identity Provider Name for example “Beyond Identity”
Type in an Identity Provider Contact
Select SAML2 as the protocol
Click Next

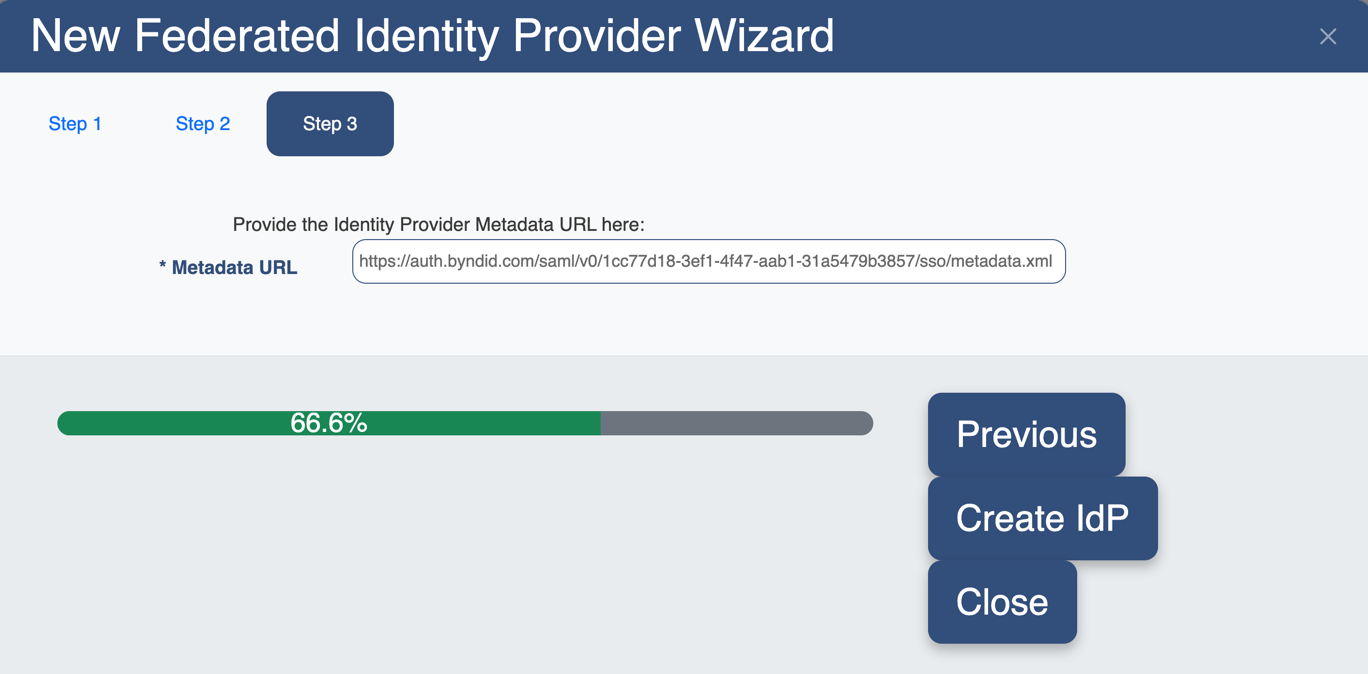
In New Federated Identity Provider Wizard screen, under Step 3
Type in the Metadata URL from 1.1.b
Click Create IdP
This completes setup of BI as the SAML IDP
Note down the Identifier/URN of the IDP. This will be used in the authentication policy

Step 1.3: Setup Authentication Policy in OptimalIDM to use SAML IDP
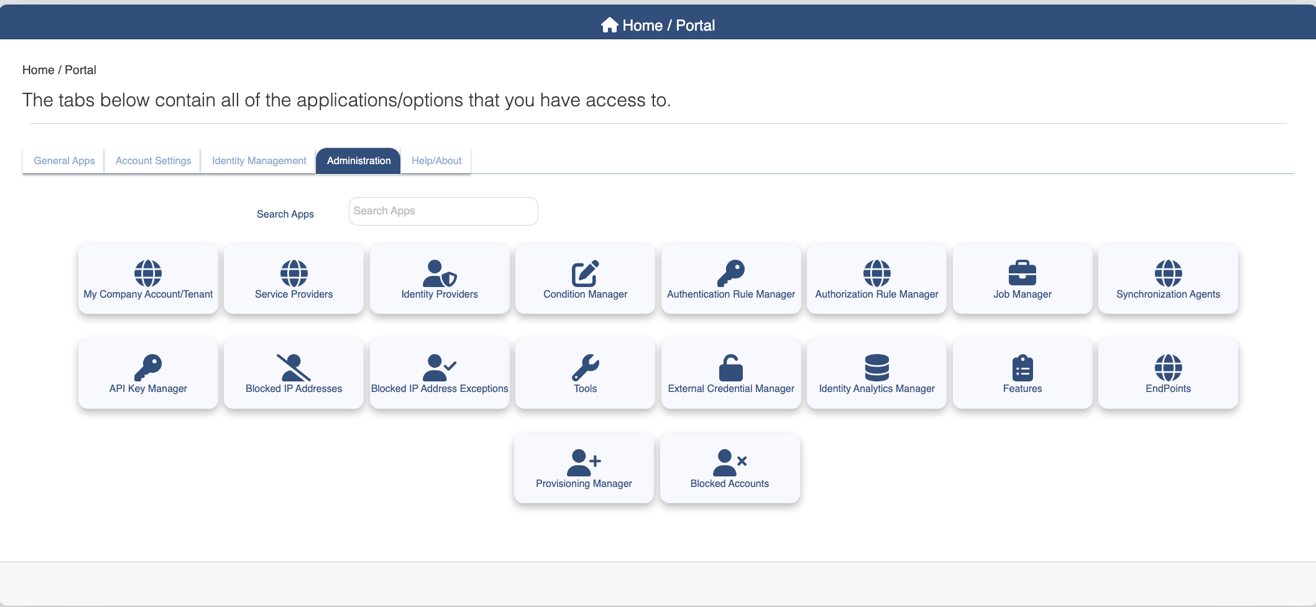
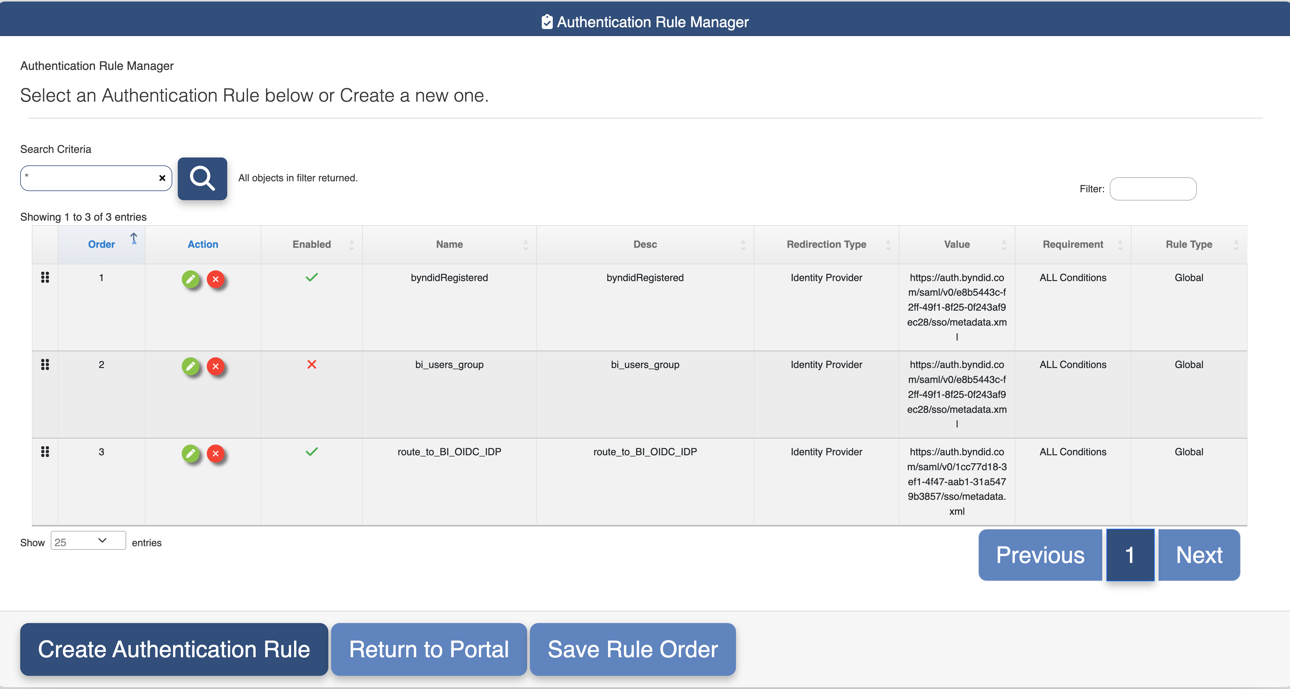
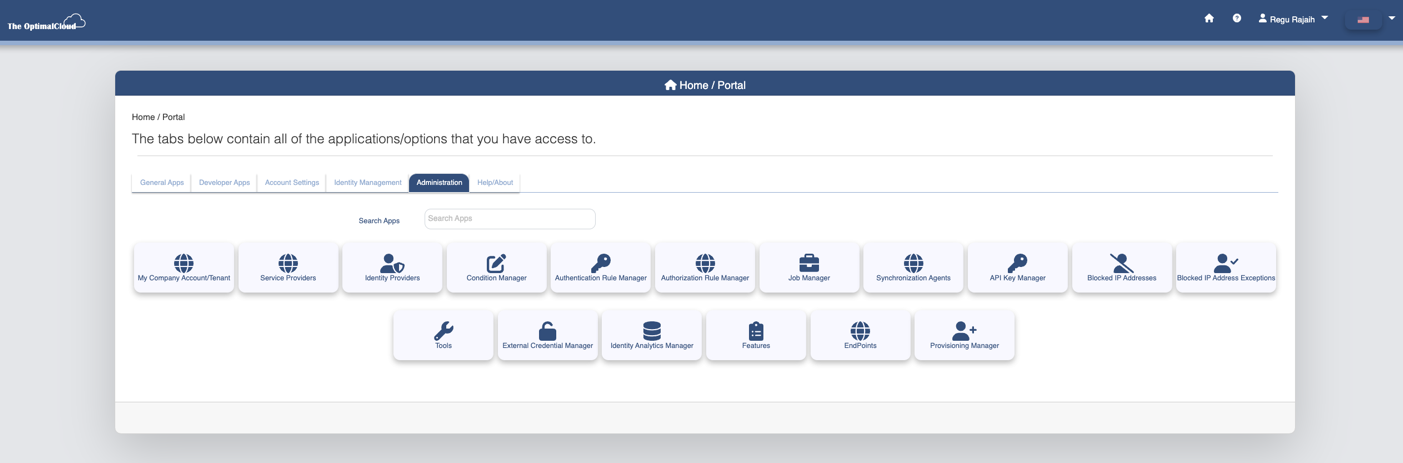
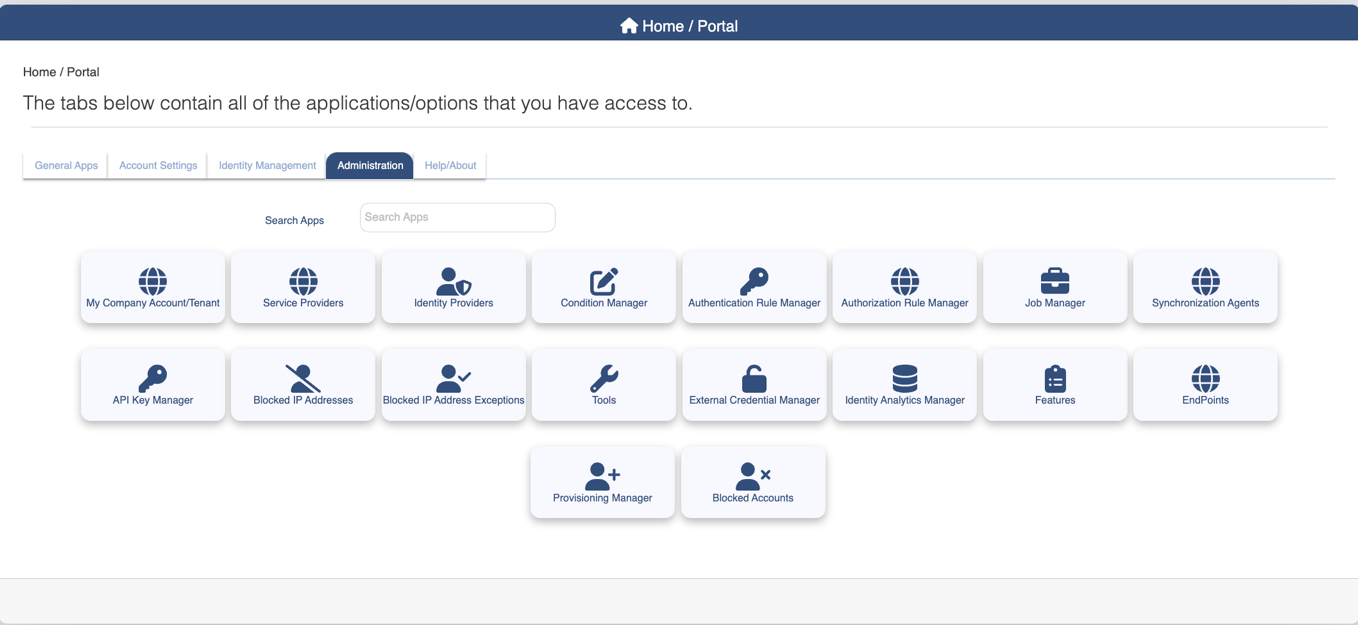
Login to your optimalIDM tenant as a tenant admin. Click on Administration tab. Click Authentication Rule Manager
Login to your optimalIDM tenant as a tenant admin. Click on Administration tab.
Click Authentication Rule Manager.
In Authentication Rule Manager screen, click Create Authentication Rule
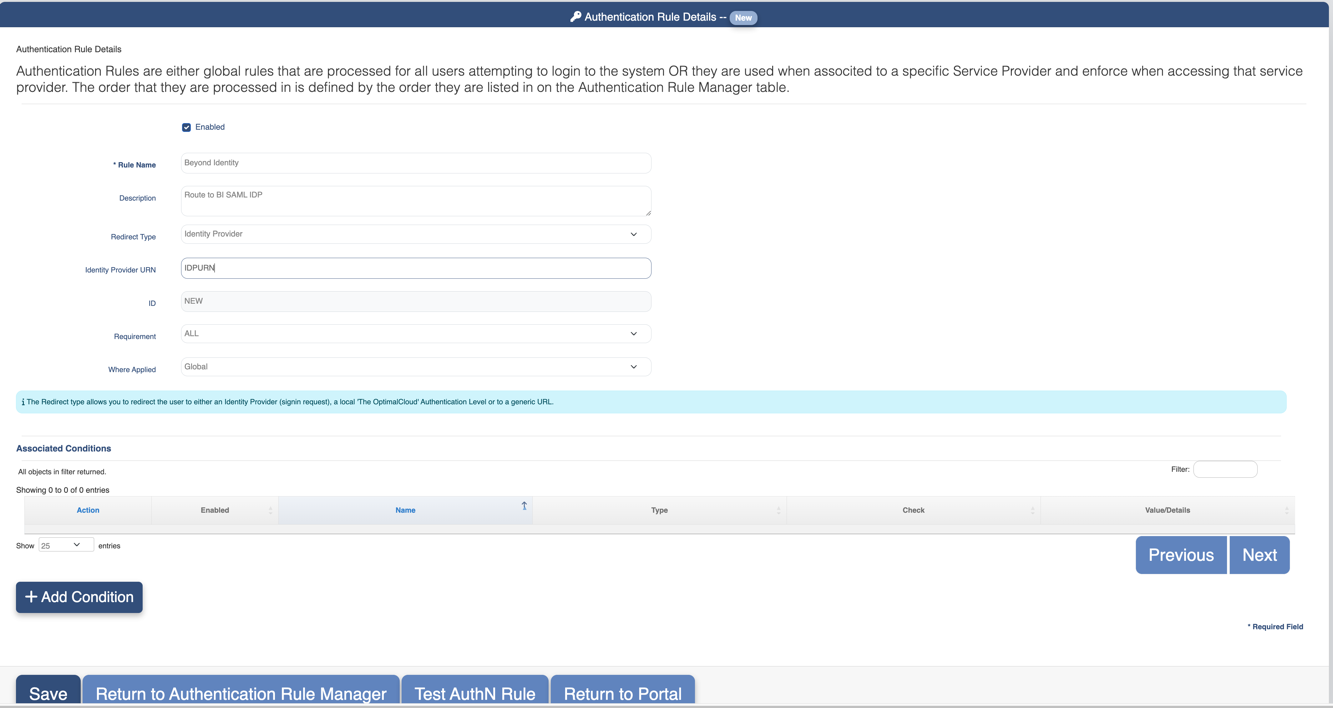
In Authentication Rule Details screen
Select Enabled
Type in a Rule Name and description
Choose Identity Provider in Redirect Type drop down
Type in the IDP URN noted in section 1.2.e
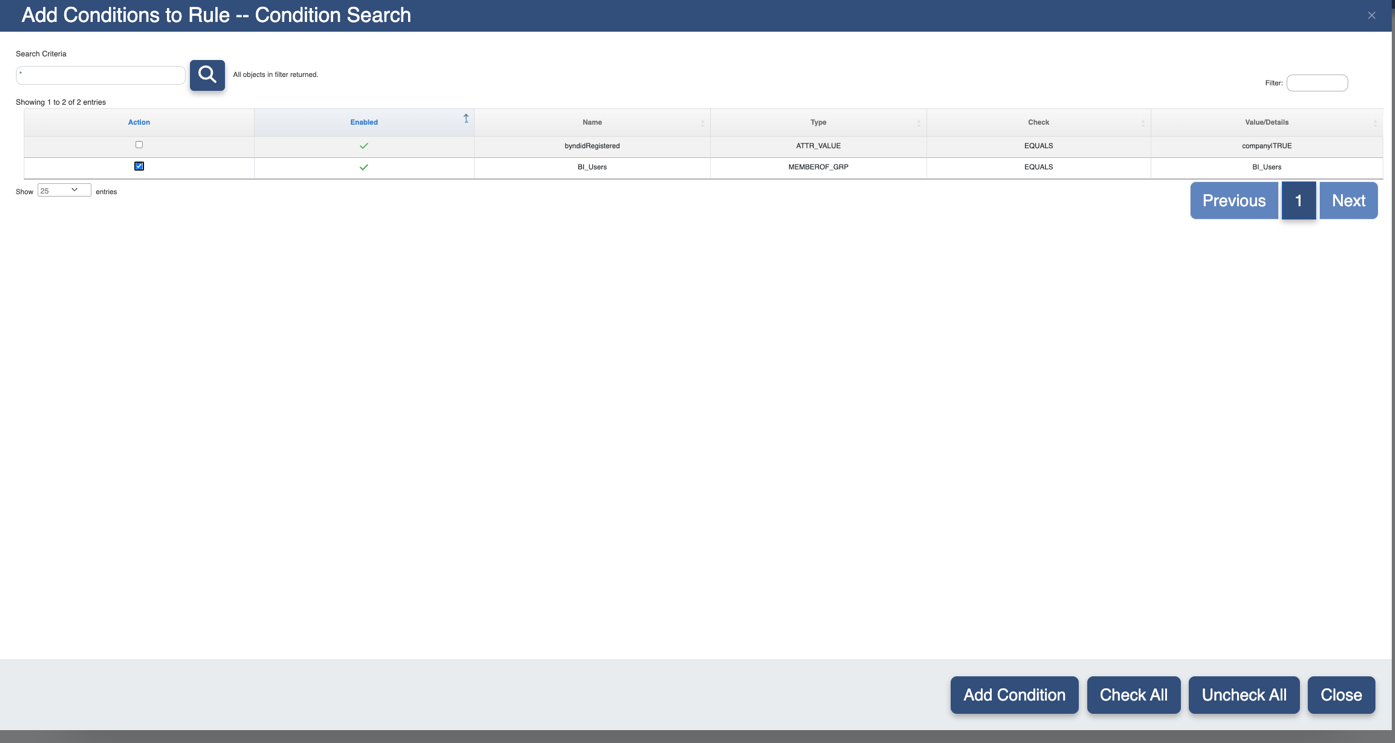
Click Add Condition
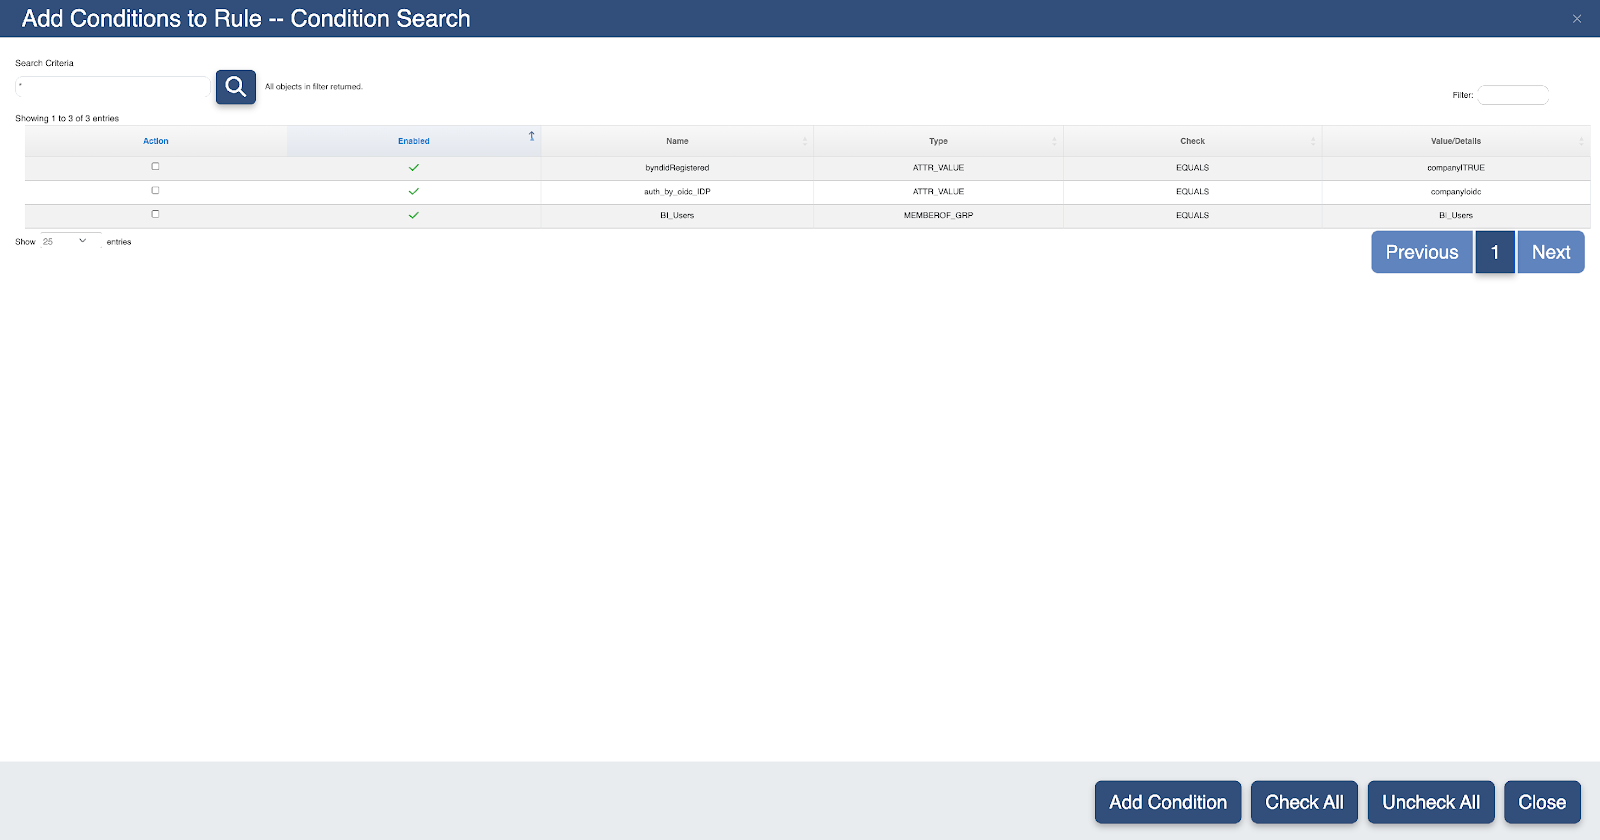
In Add Conditions to Rule screen, select the condition and click Add Condition
In the next screen, click Save
When users who match the condition login to OptimalIDM tenant, they will be routed to BI SAML IDP

Step 2: Setup Beyond Identity Admin Console Application in OptimalIDM
Login to your optimalIDM tenant as a tenant admin. Click on Administration tab and then click on service providers tab
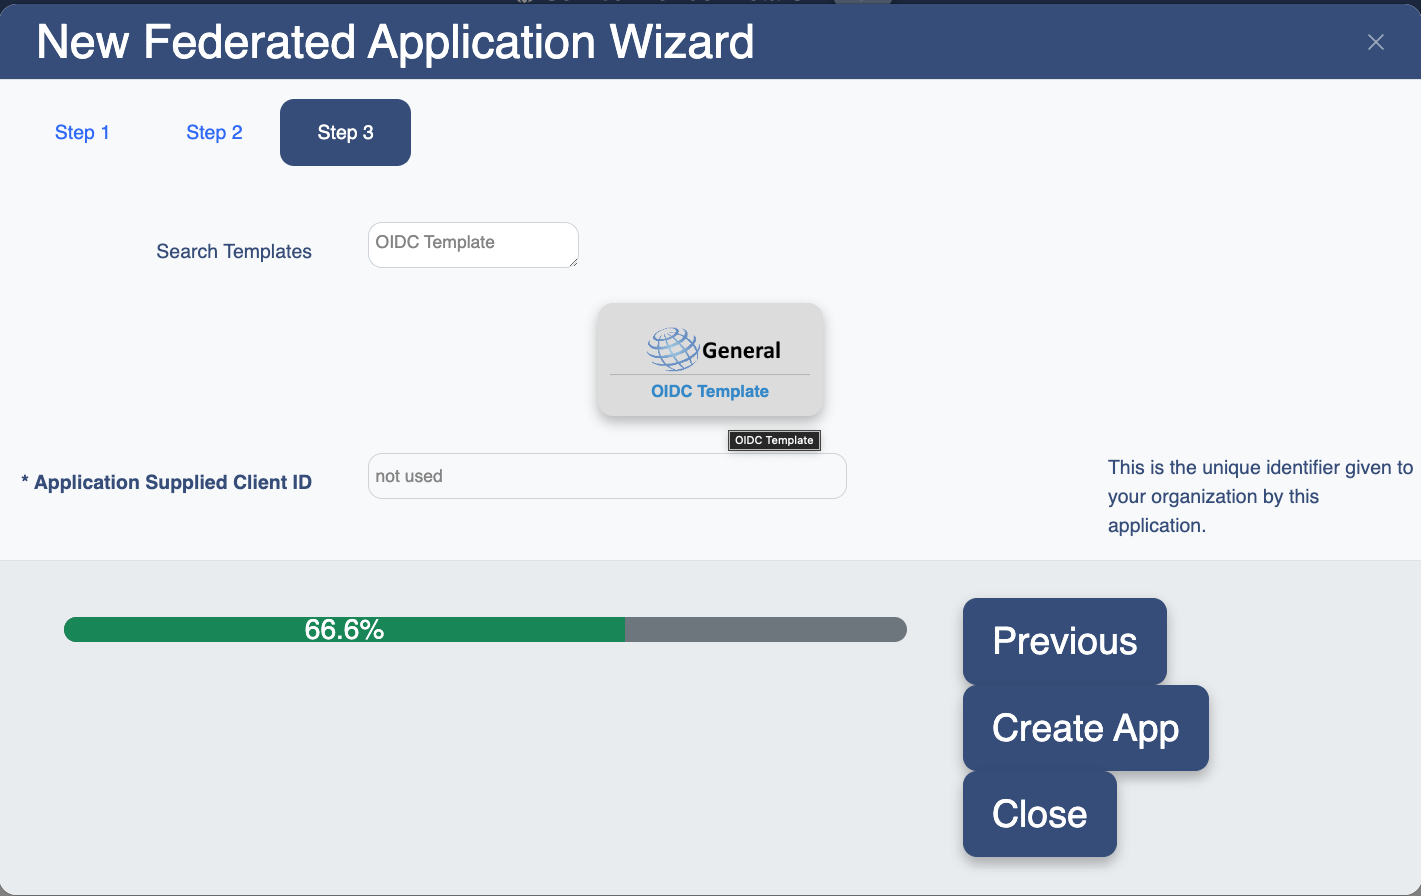
In the New Federated Application Wizard, in step1 , choose Create from Template and click Next

In Step 2 of New Federated Application Wizard, check Add Portal Application. Enter a name for the Application Name and Application Contact. Choose Oauth2 /OpenID Connect and click Next

In Step 3 of New Federated Application Wizard, in search Template, type OIDC Template. From the search results, choose General OIDC Template and click Create App
In service provider details screen, under General tab
Check Enabled
Choose OAUTH2/OIDC for protocol
Enter an Application Name and a Contact Info
In URN/Identifier, type in a value for the client ID, for example “beyond-optimalidm-bi-admin-console”. This value will be used in BI admin console setting up BI admin console OIDC SSO
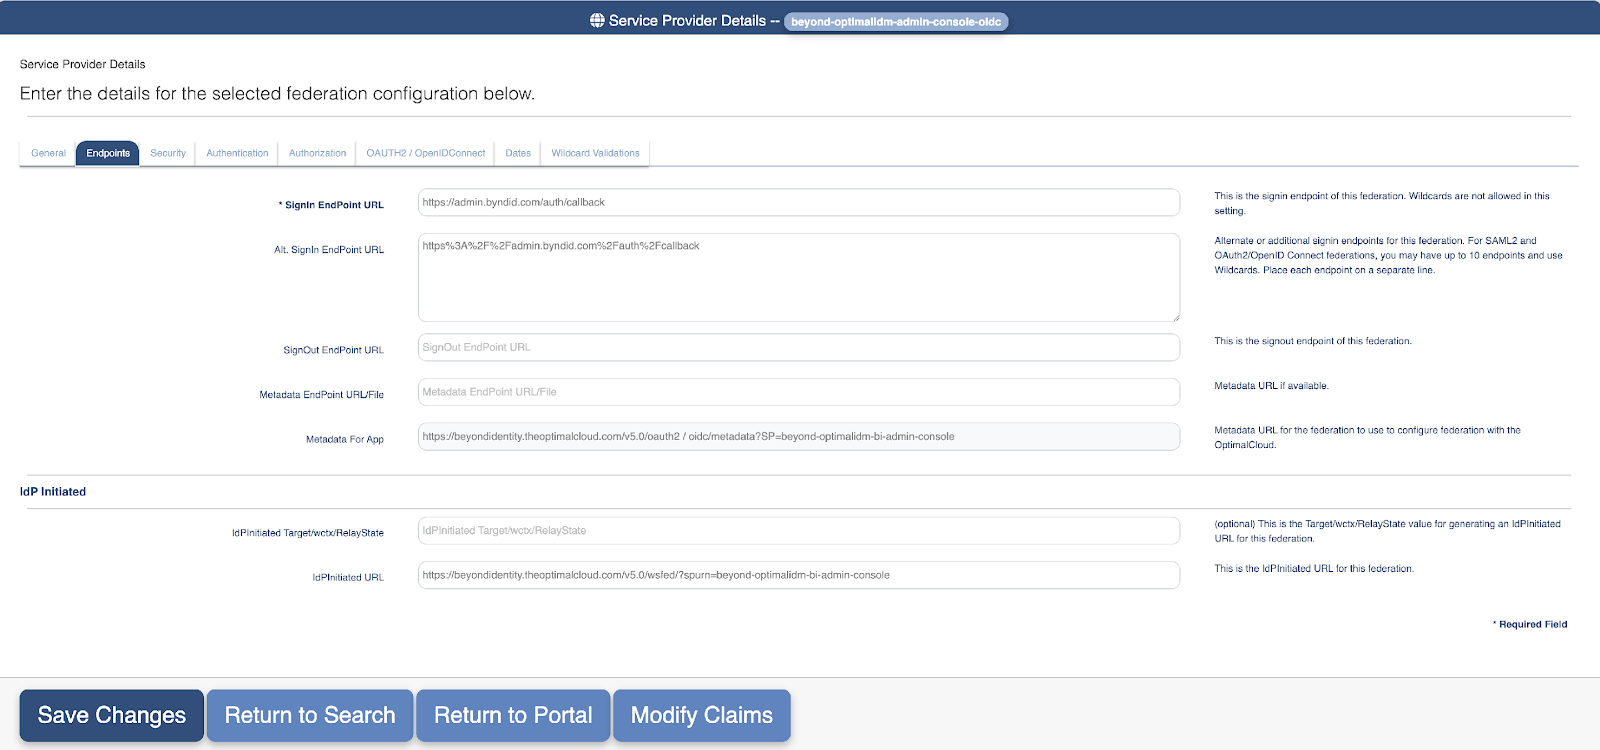
In service provider details screen, under Endpoints tab
Enter https://admin.byndid.com/auth/callback as Signin Endpoint URL
Leave the other values to default
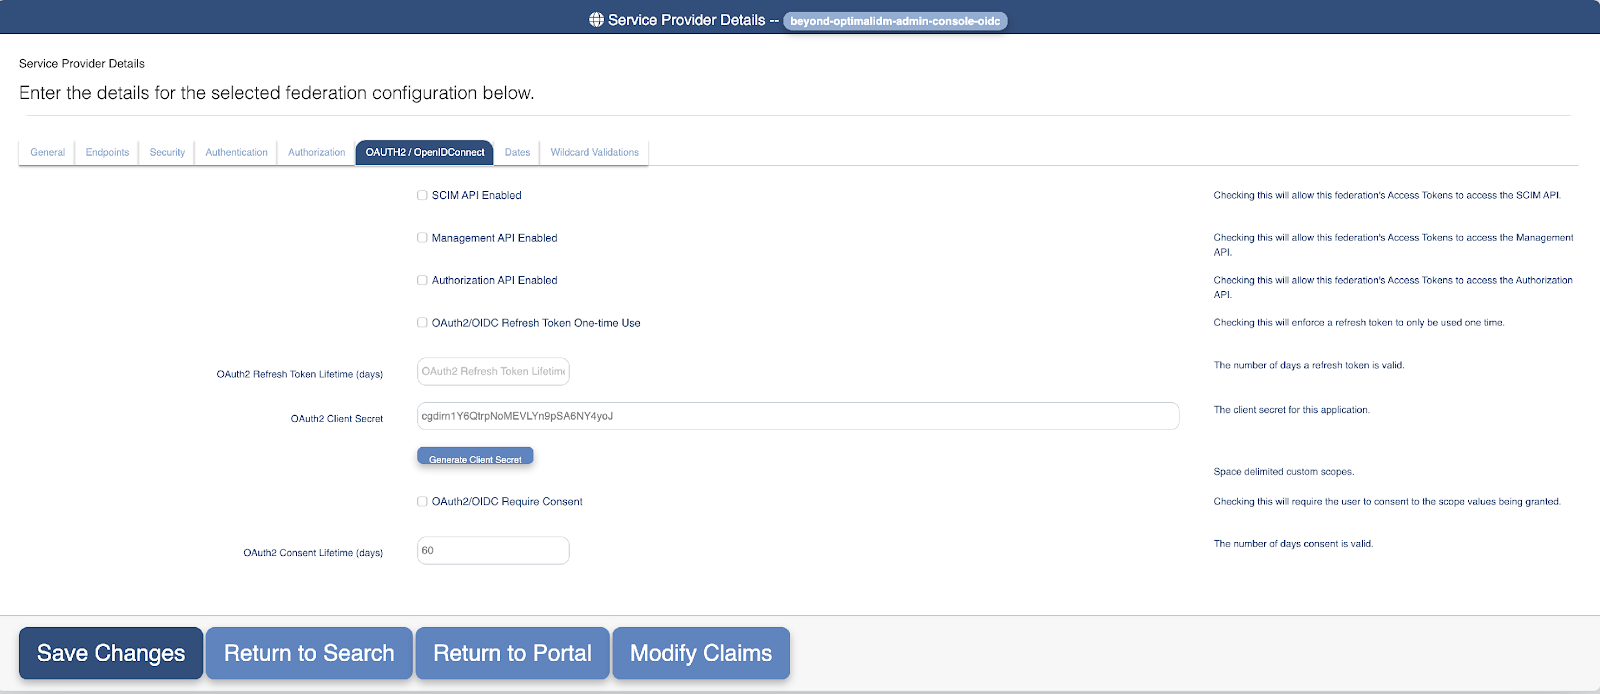
In service provider details screen, under OAUTH2/OpenIDConnect tab

Click Generate Client Secret
Note down the value of client secret. This is required in setting up BI admin console SSO in BI admin console
Click Save Changes
Step 3: Setup Admin Console Access
Provide Client ID and Client Secret assigned to Admin Console Application in steps 1.e and 1.g to Beyond Identity SE. The Beyond Identity team will collect and populate those values using BI admin console
After these values are provisioned, login and confirm that admin has access to Beyond Identity Admin Console.
Step 4: Setup Beyond Identity User Console Application in OptimalIDM
Repeat similar steps as outlined in Step 2: Setup Beyond Identity Admin Console Application in OptimalIDM
In service provider details screen, under Endpoints tab, enter https://user.byndid.com/auth-user/?org_id=BI_TENANT_ID as Signin Endpoint URL
Note down the client ID and client secret
Step 5: Setup Beyond Identity User Portal Authentication
Once logged into Beyond Identity Admin Console, click on Settings
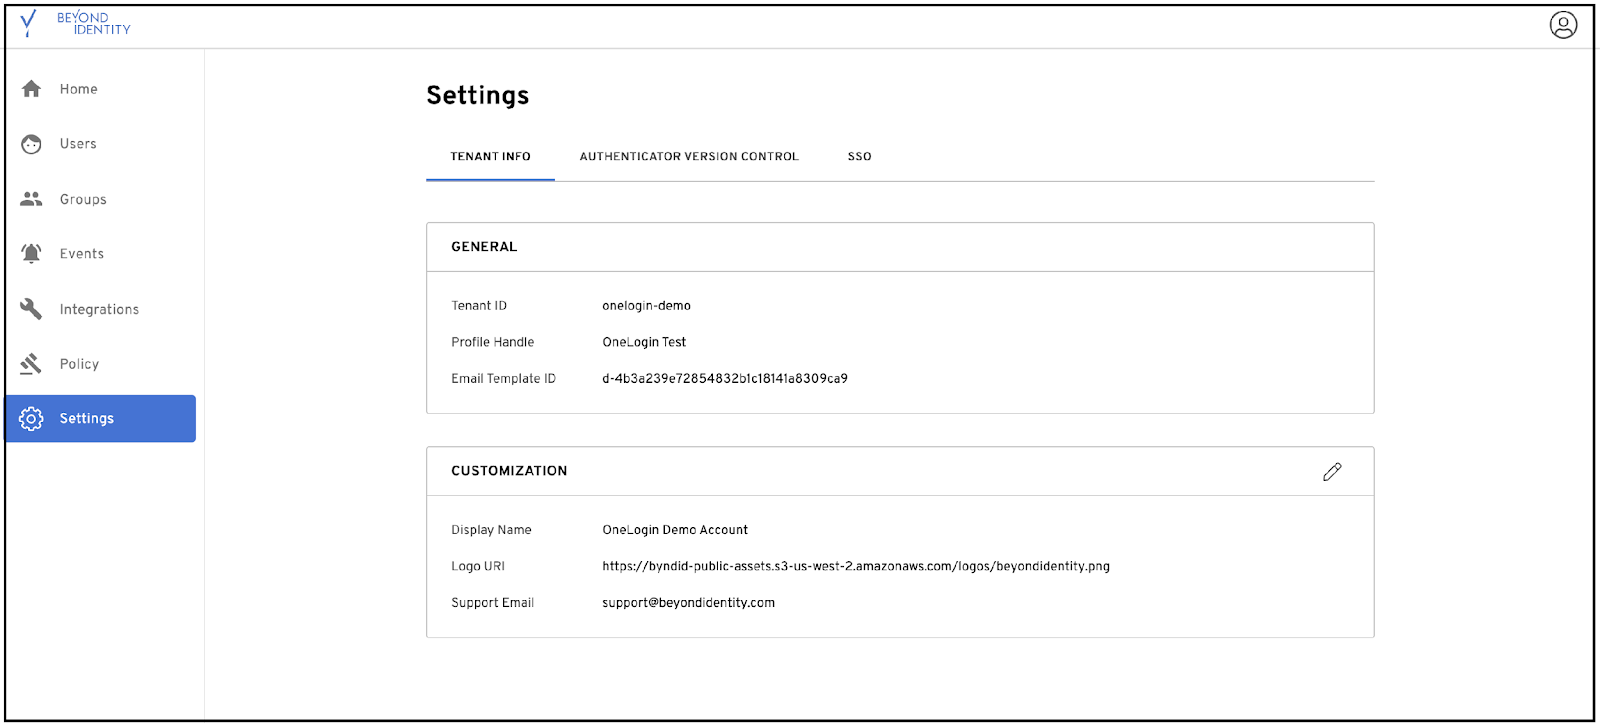
Click on SSO tab > User Console SSO Integration > Add OIDC SSO
Update Name, Client Id, Client Secret (from 4.c)
Enter issuer as “https://[your_tenant].theoptimalcloud.com/v5.0”
Enter Token Field as sub and select Token Field Lookup as external_id.
Click Save Changes

Step 6: Set up SCIM in OptimalIDM to BI Tenant
The SCIM setup will scim members of a specific group, for example BI_users
The steps required in order are
Create a condition of type MEMBER_OF that checks if the user is a member of Bi_users group
Create an authorization rule and associate condition created in step a
Create a provisioning destination and associate authorization rule created in step b
Step 6.1: Create MEMBER_OF condition
Login to your optimalIDM tenant as a tenant admin. Click on Condition Manager
In the Condition Manager screen, click Create Condition
In the Condition Details screen
Type in a name and description for the condition
Choose MEMBER_OF_GRP in condition type drop down
Choose Equals in condition check drop down
Type in Bi_users in Group(s) text
Click Save changes


Step 6.2: Create Authorization Rule
Login to your optimalIDM tenant as a tenant admin. Click on Authorization Rule Manager
In Authorization Rule Manager screen, click Create Authorization rule
In Authorization Rule Details screen
Type in a Rule name and description
Leave other fields with the defaults
Click Add Condition
In Add Conditions to Rule – Condition Search screen
Select the condition created in 6.1.c
Click close
In next screen, click Save


Step 6.3: Create provisioning destination
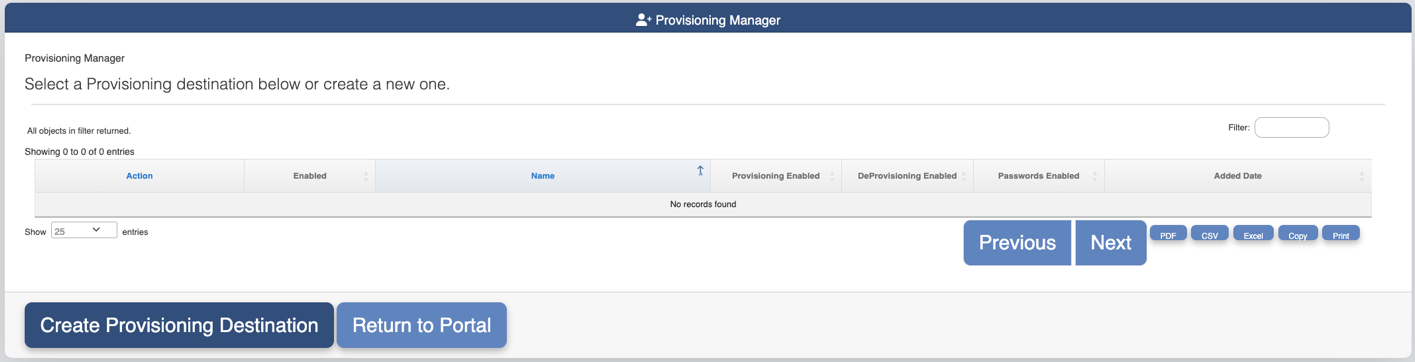
Login to your optimalIDM tenant as a tenant admin. Click on Provisioning Manager
Click Create Provisioning Destination in Provisioning Manager screen
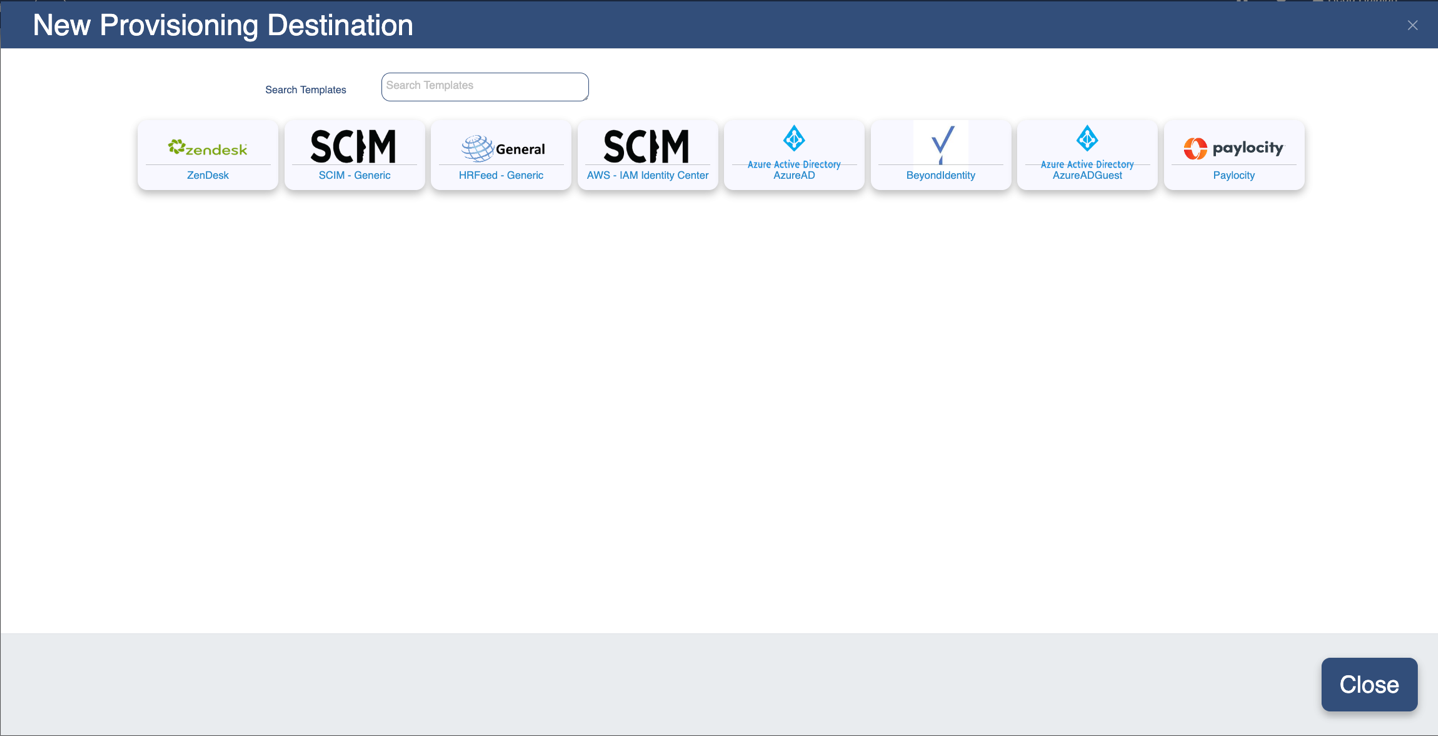
Click Beyond Identity in New Provisioning Destination screen
In Provisioning Details screen, under Provisioning Configuration tab
Type in the tenant api token provided by BI SME as the apikey field
Type in https://api.byndid.com/scim/v2/ as the scim_endpoint

In Provisioning Details screen, under User Provisioning tab
Check Provisioning Enabled
Check Deprovisioning Enabled
Uncheck Password Syncs Enabled
Check Provisioning Suspended Users
Choose Disable in Deprovisioning Type drop down
Choose the authorization rule created in step 6.2 in Authorization Rule drop down
Click Save Changes

Step 6.4: Verify SCIM
Create a user in OptimalIDM using User Manager
Create BI_users group in OptimalIDM using Group Manager
Add the user as a member of BI_users group using Group Manager
Verify in BI tenant the SCIMmed user