This article provides step-by-step instructions for enabling the Beyond Identity Safari Extension on iPhones and iPads, allowing seamless passkey authentication for web applications accessed through Safari while explaining key permission settings.
You can enable the Beyond Identity Safari Extension to streamline the authentication experience on iPhones and iPads.
Important: The extension only supports web application logins accessed via the Safari browser. Due to Apple restrictions, extensions do not work in web browsers inside of apps.
For iOS 26
Follow the steps below to configure the Beyond Identity Safari Extension on devices running iOS 26.
Click here for an interactive walk through of the process
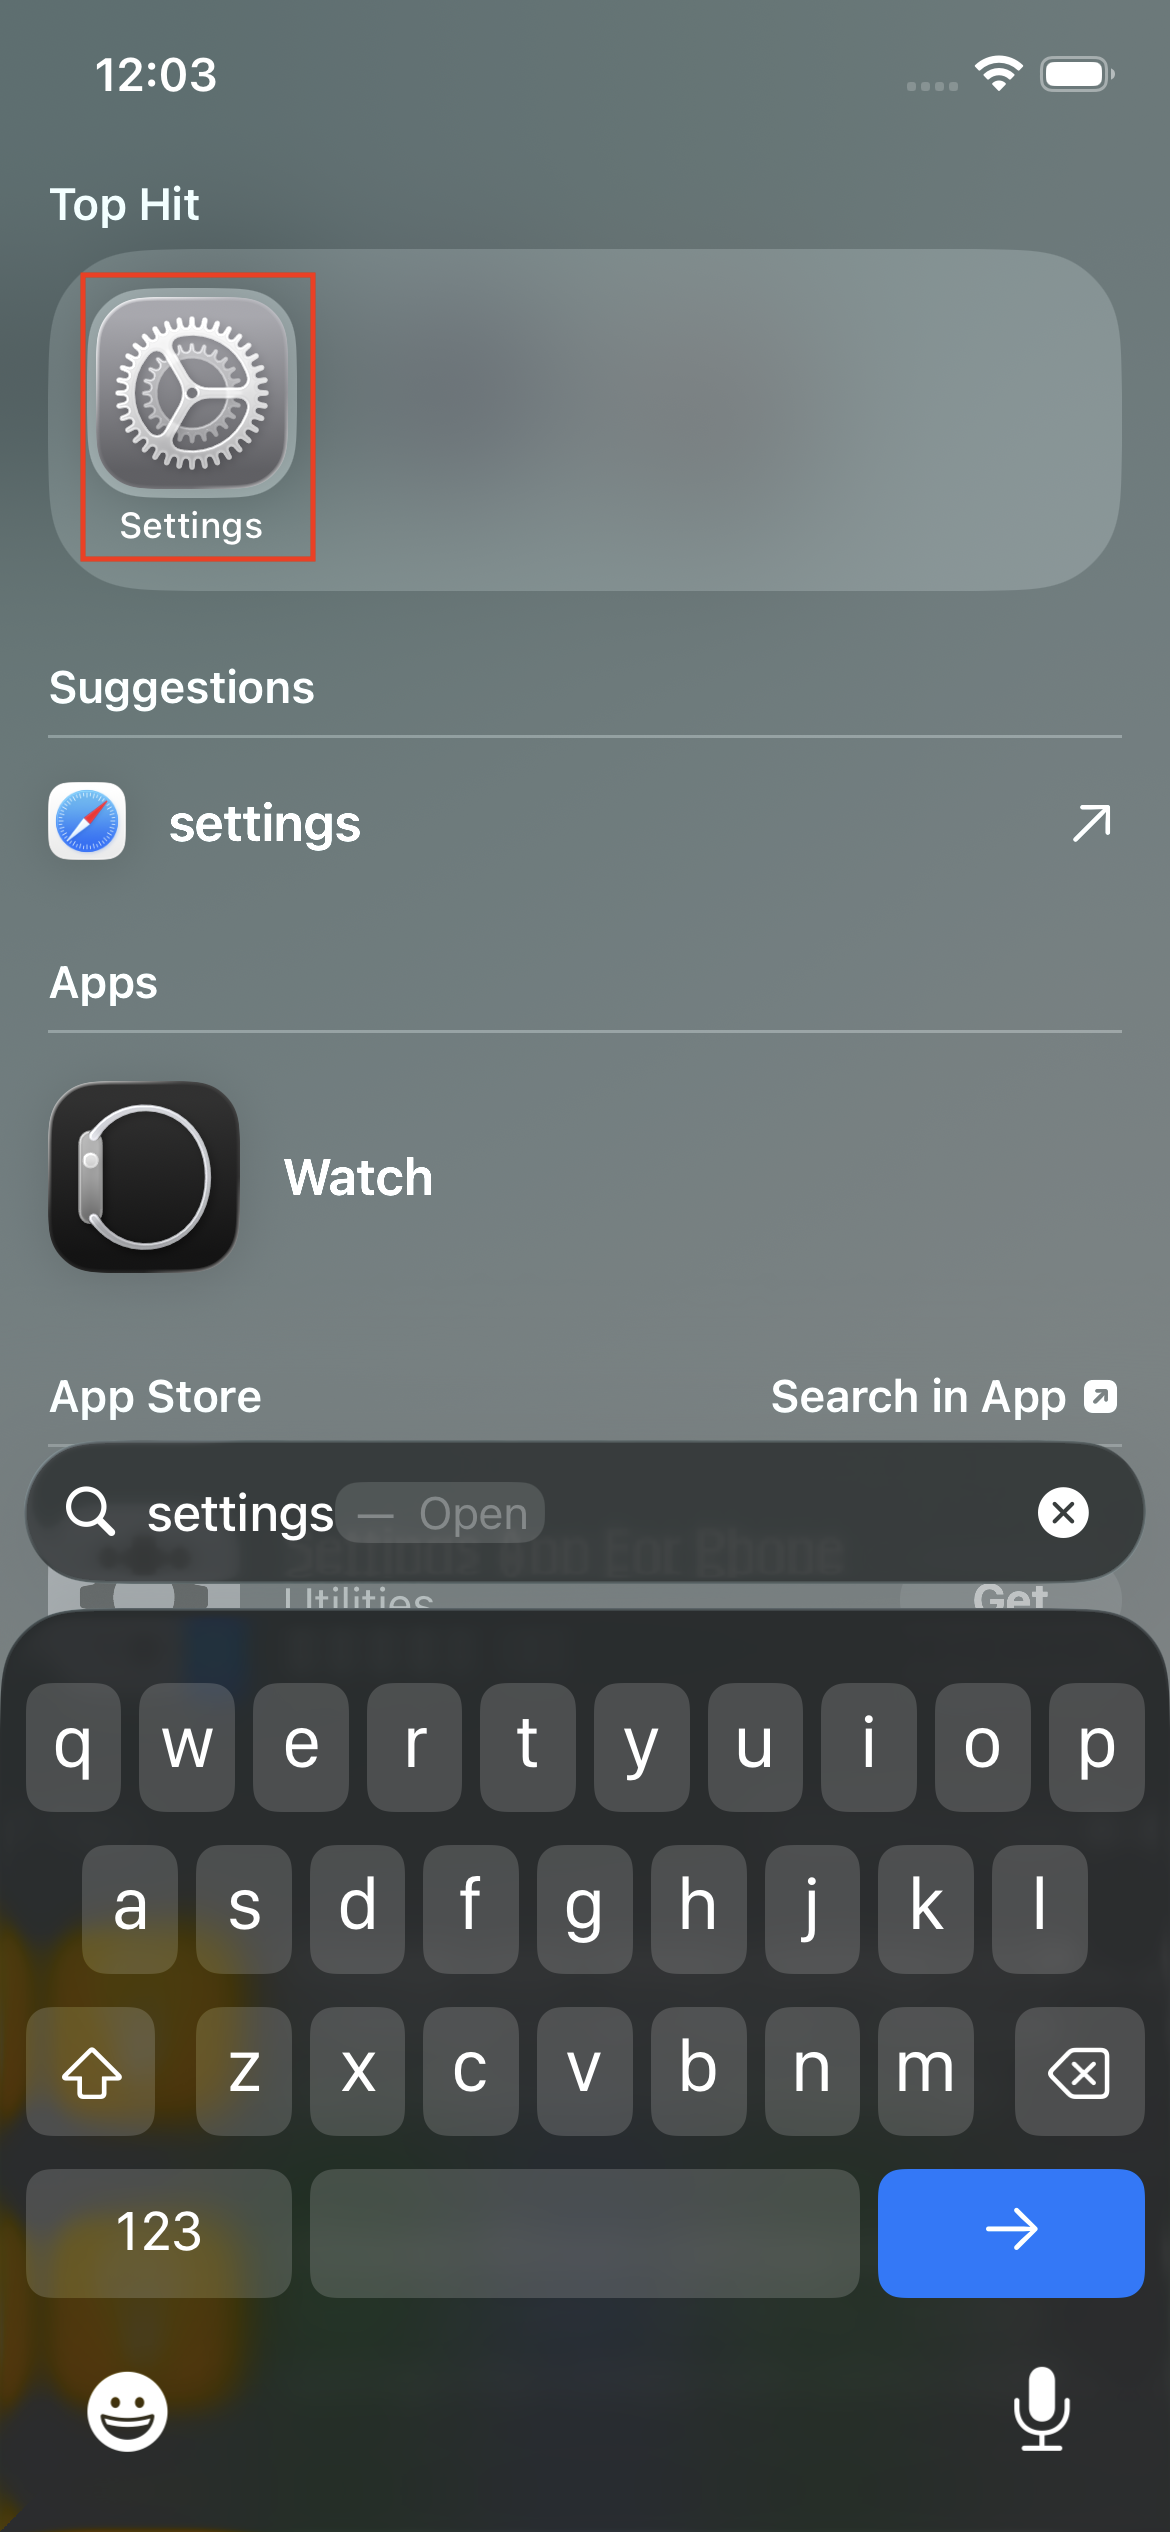
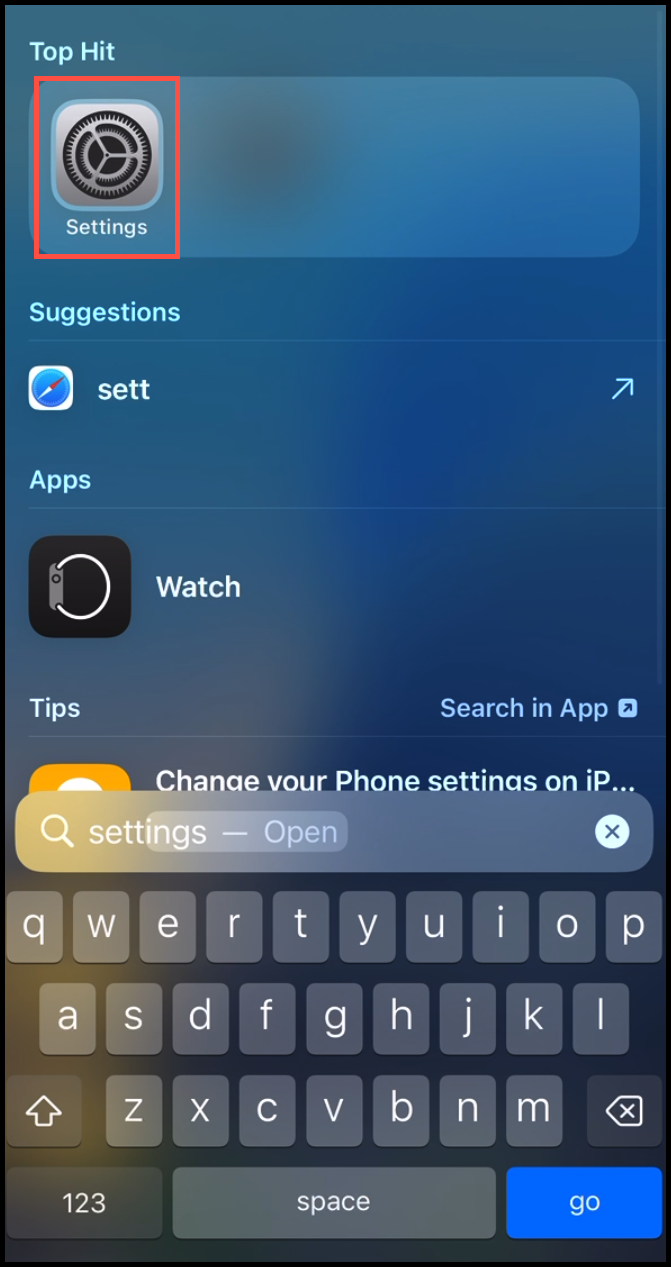
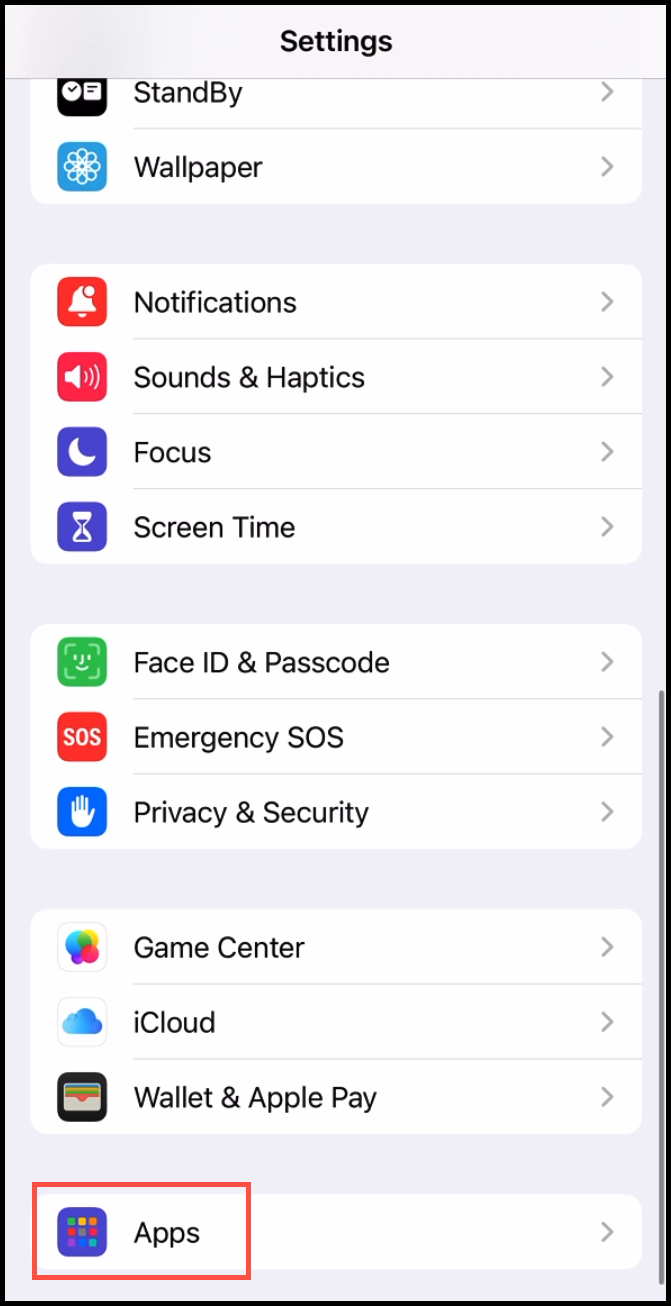
1. On your iOS device, locate and tap the Settings app.
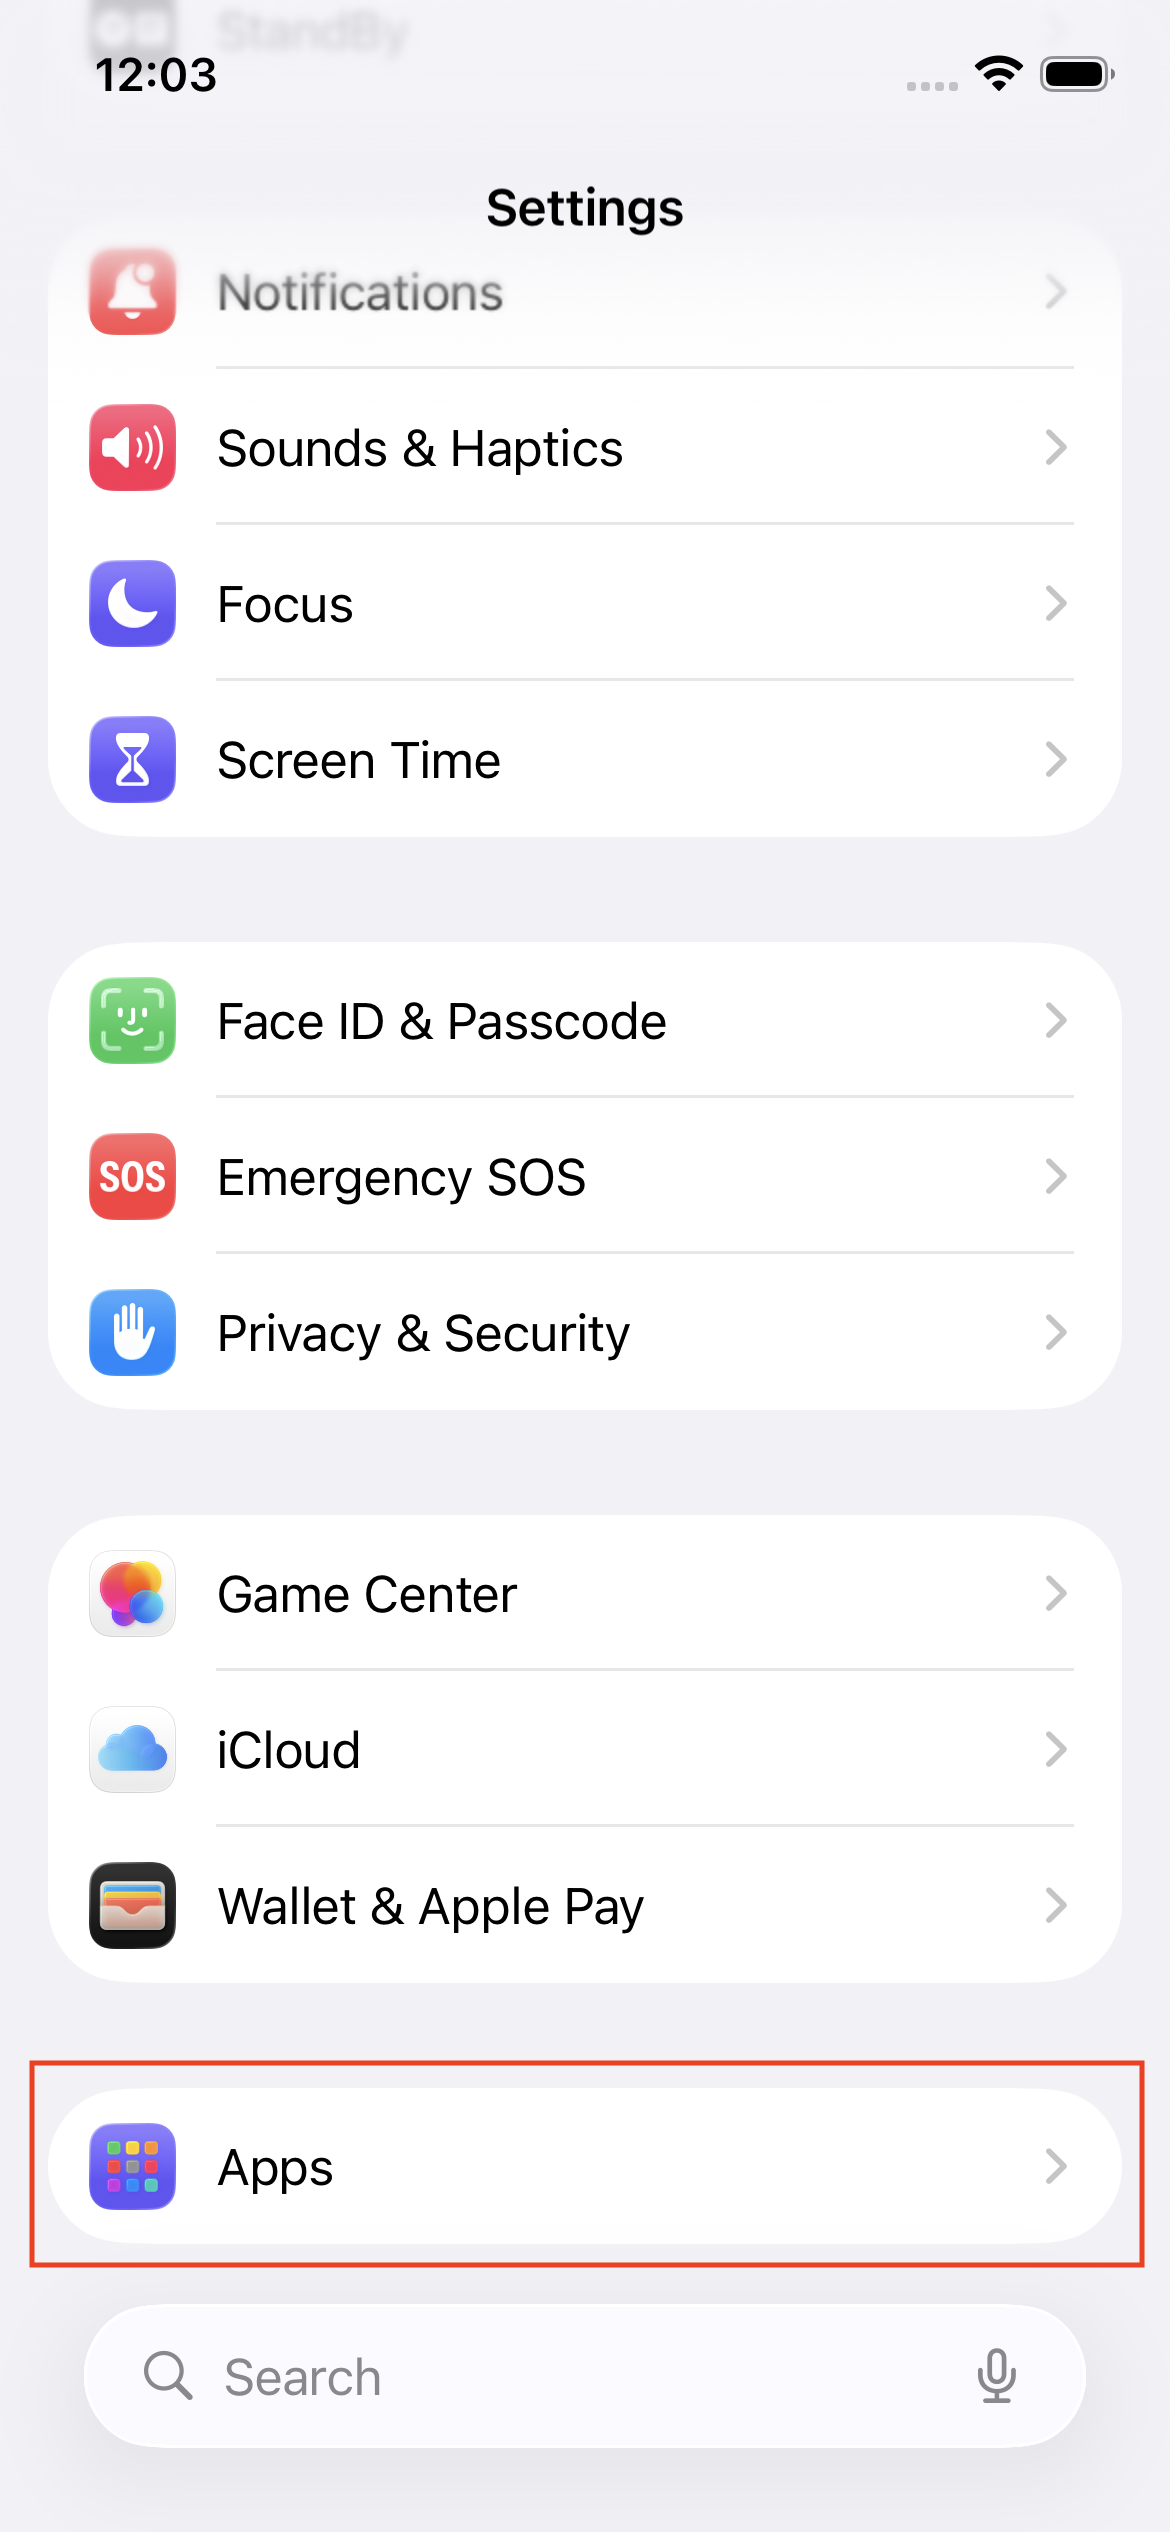
2. Next, scroll down and tap Apps.
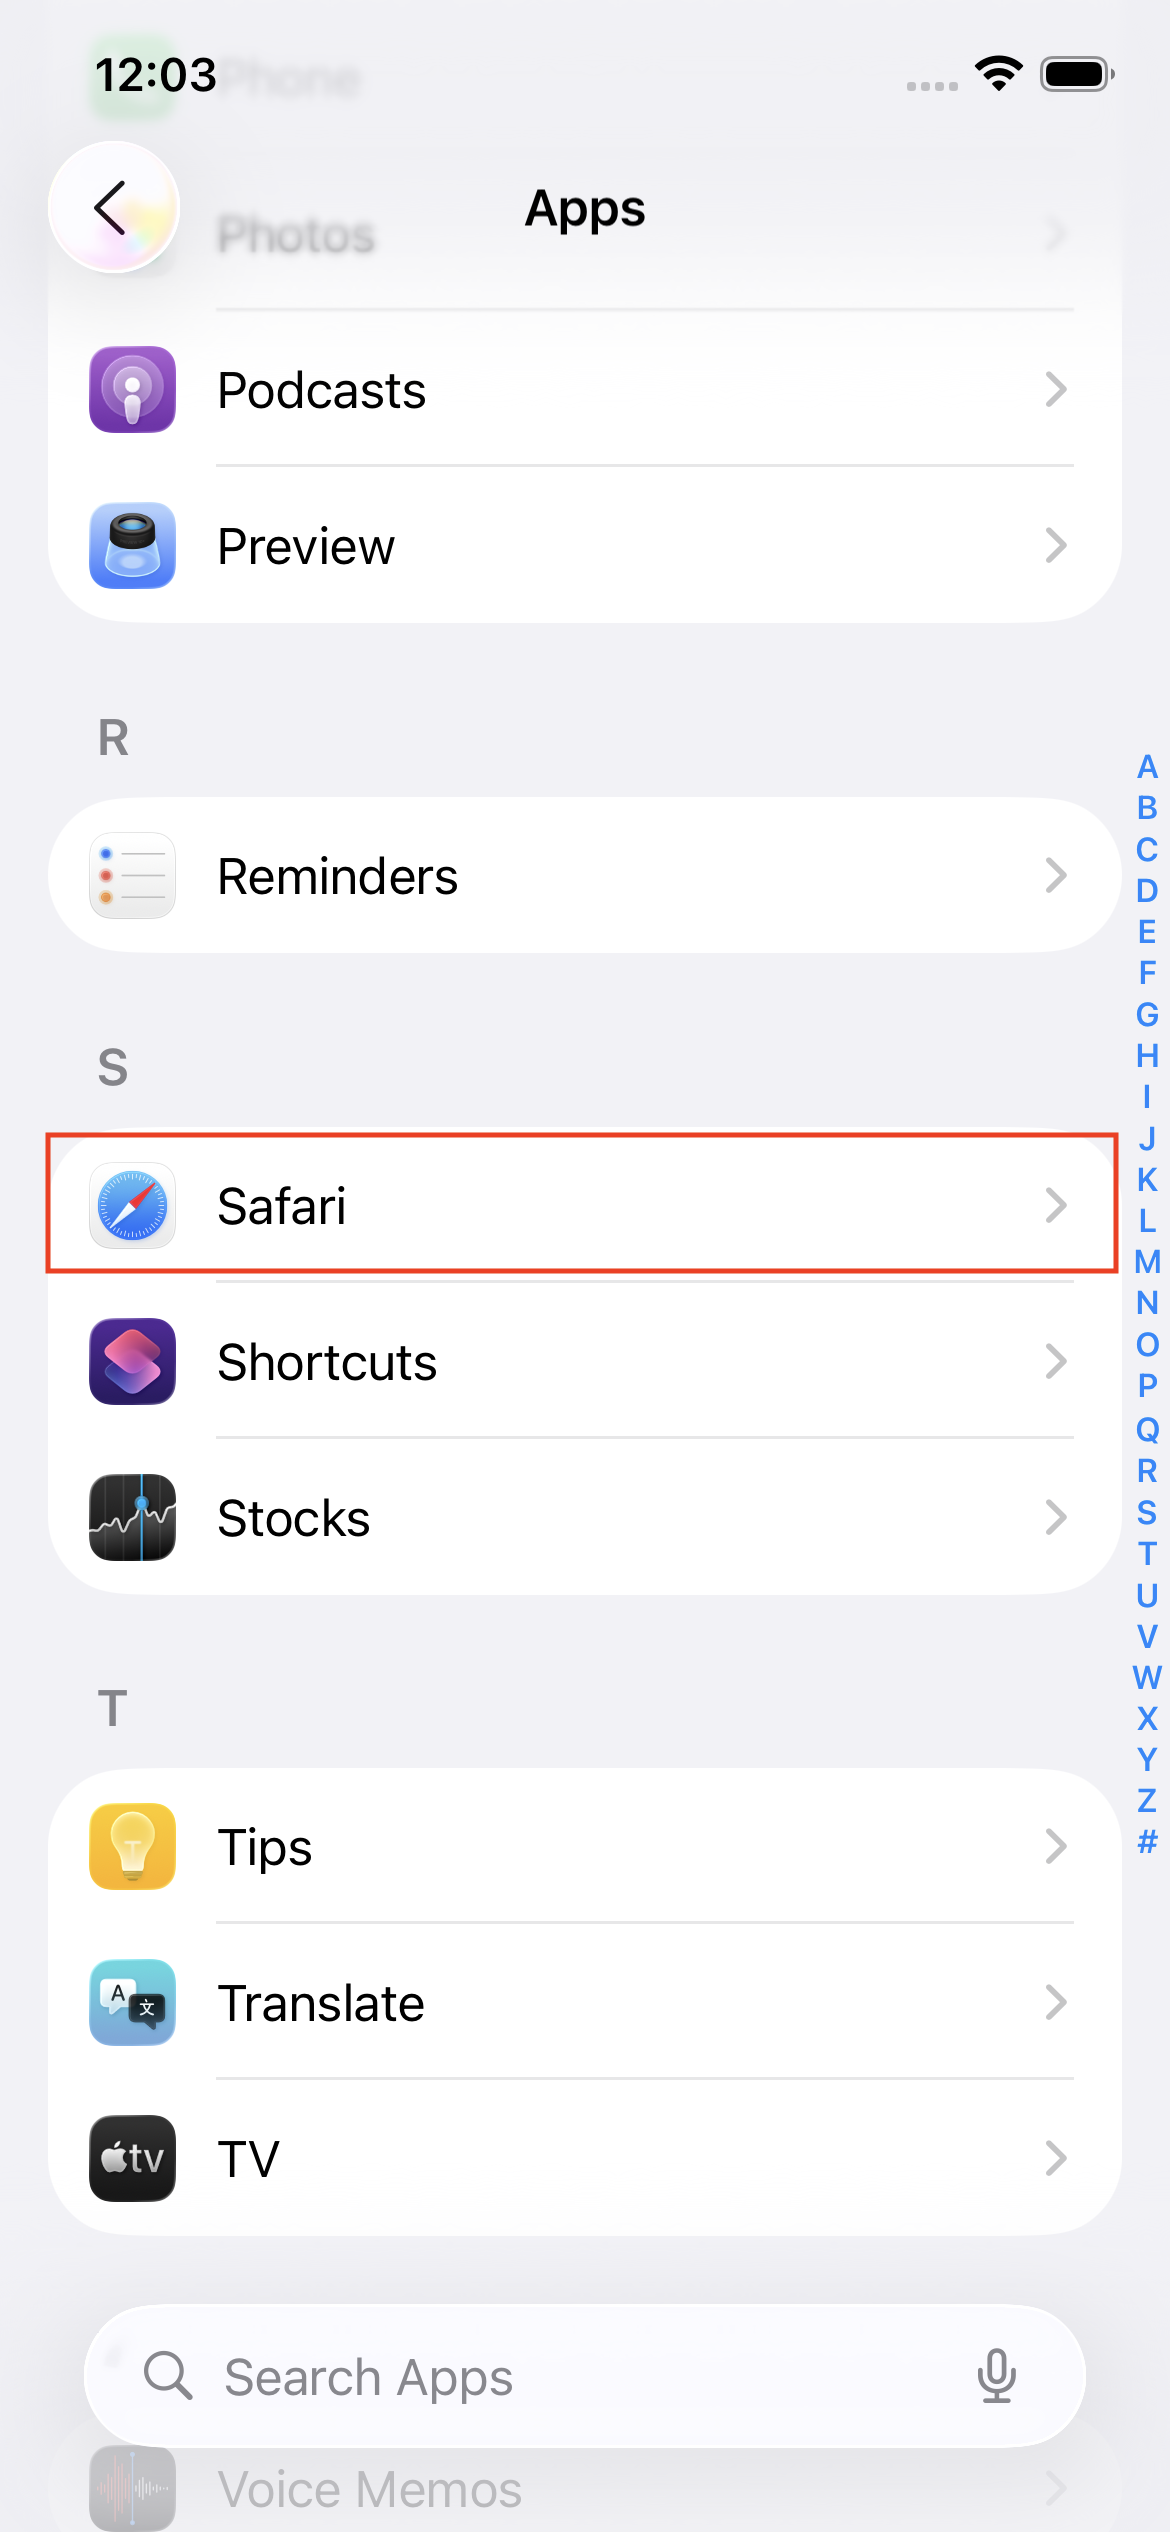
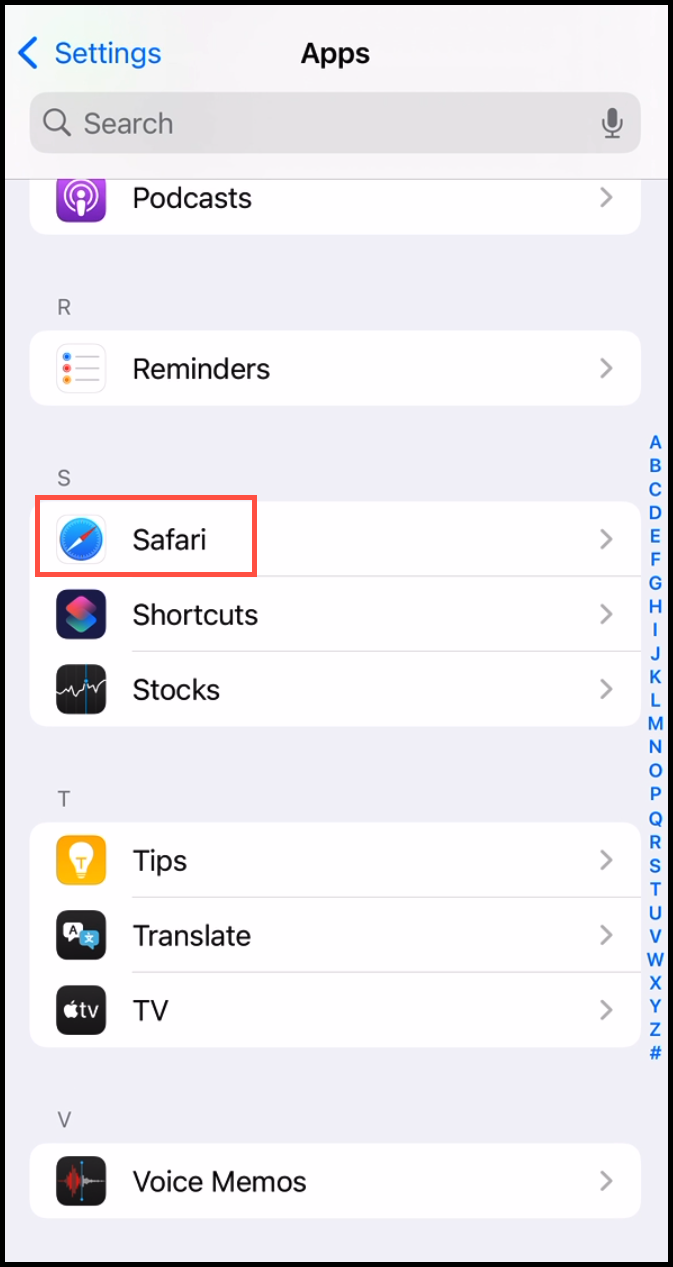
3. In the list of apps, locate and tap Safari.
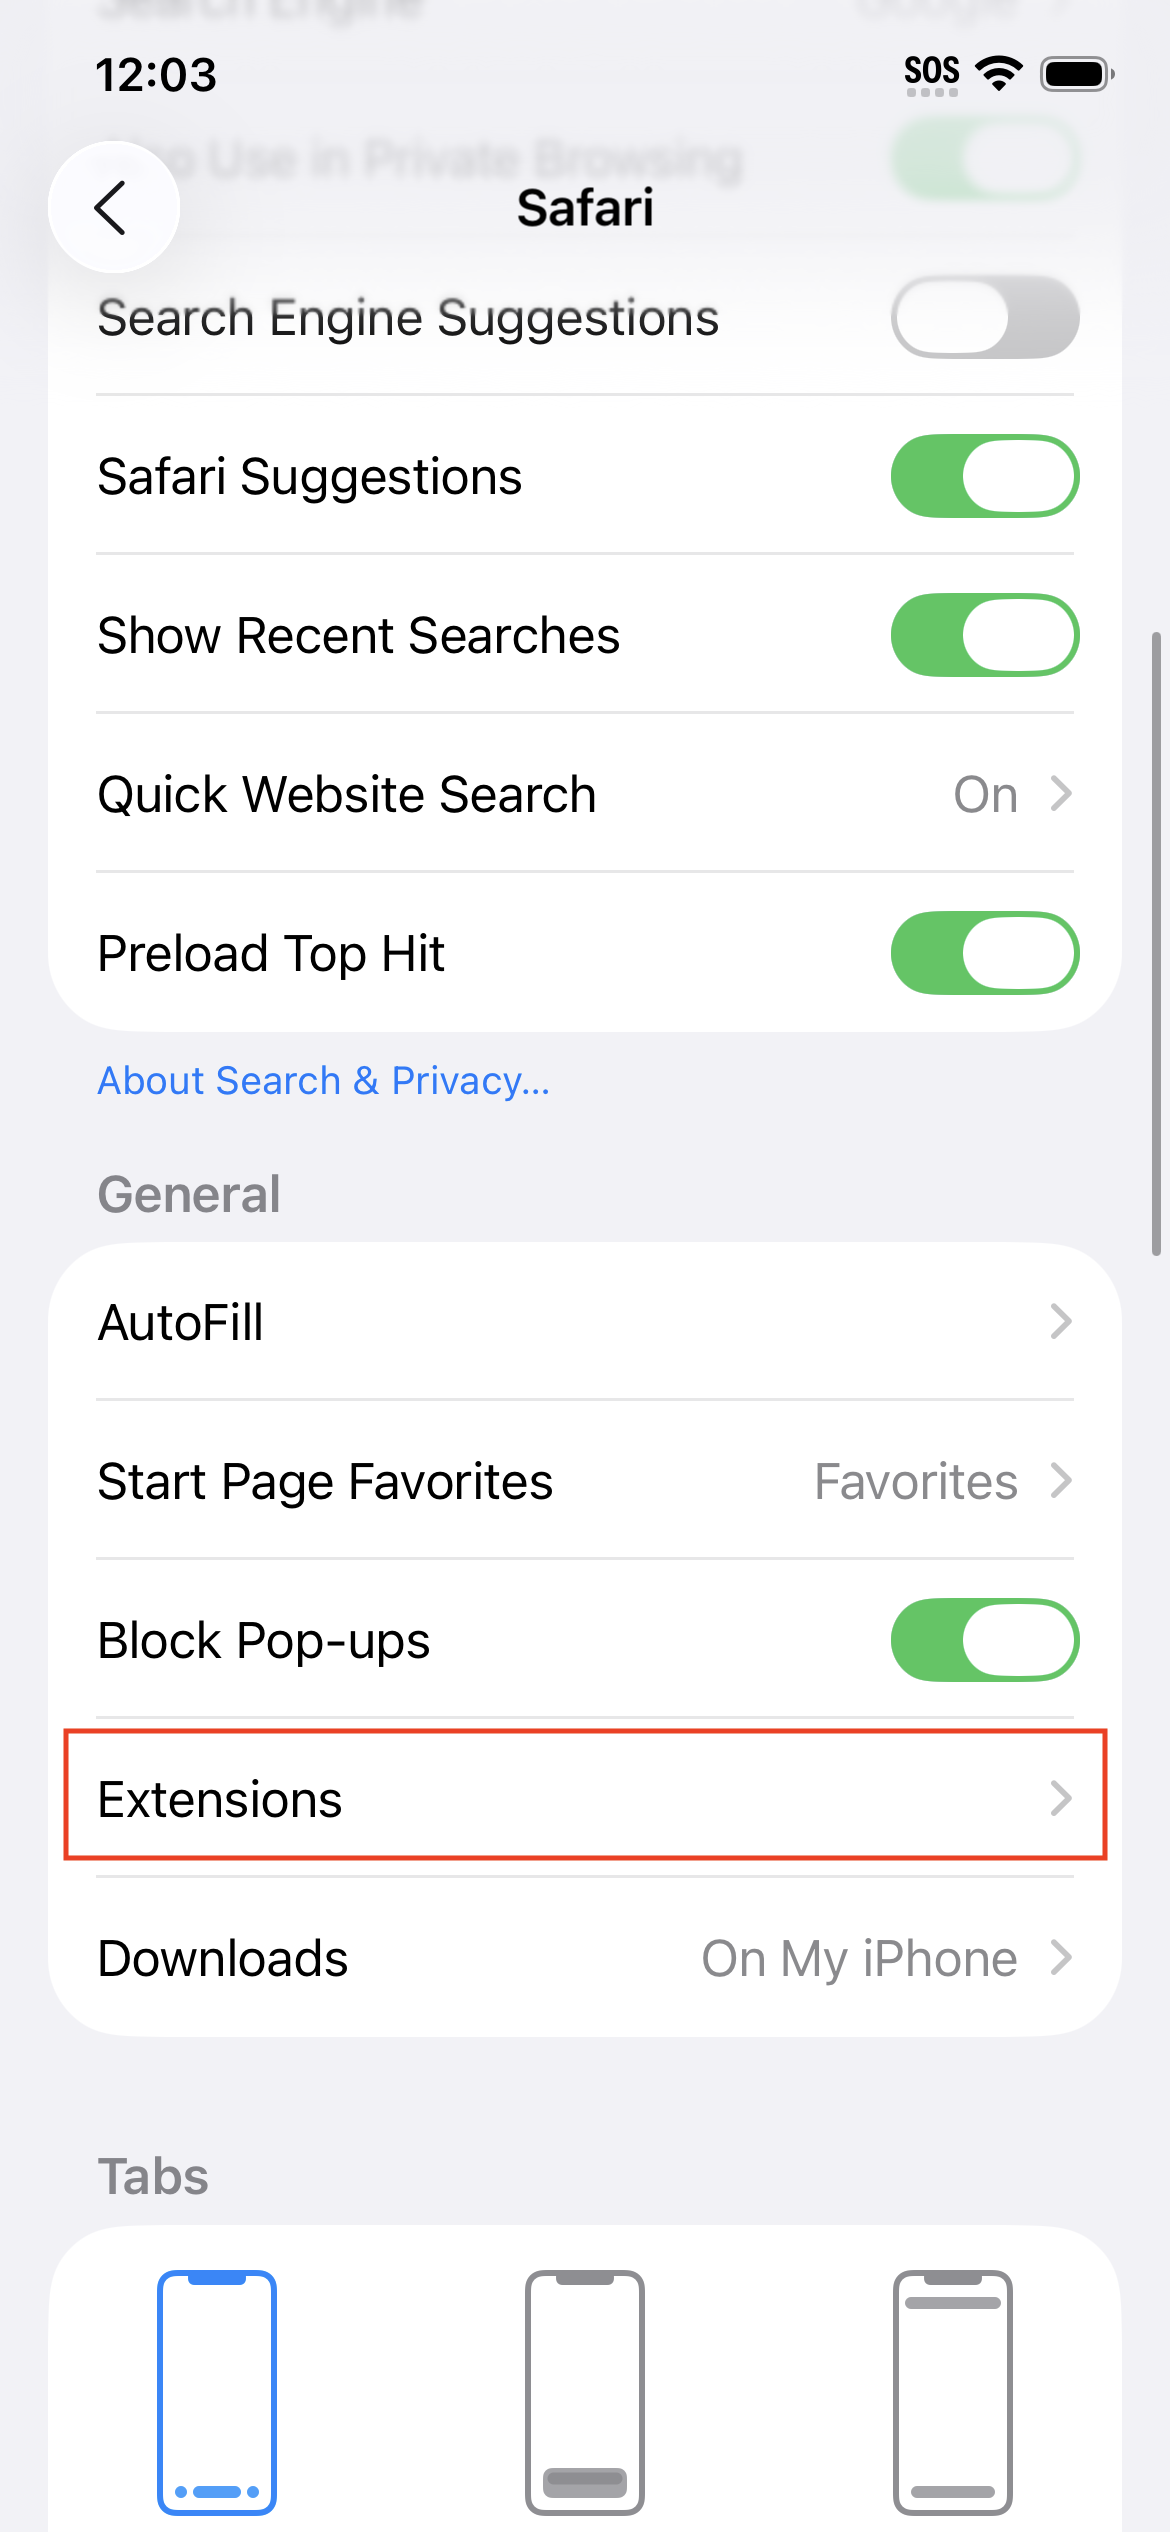
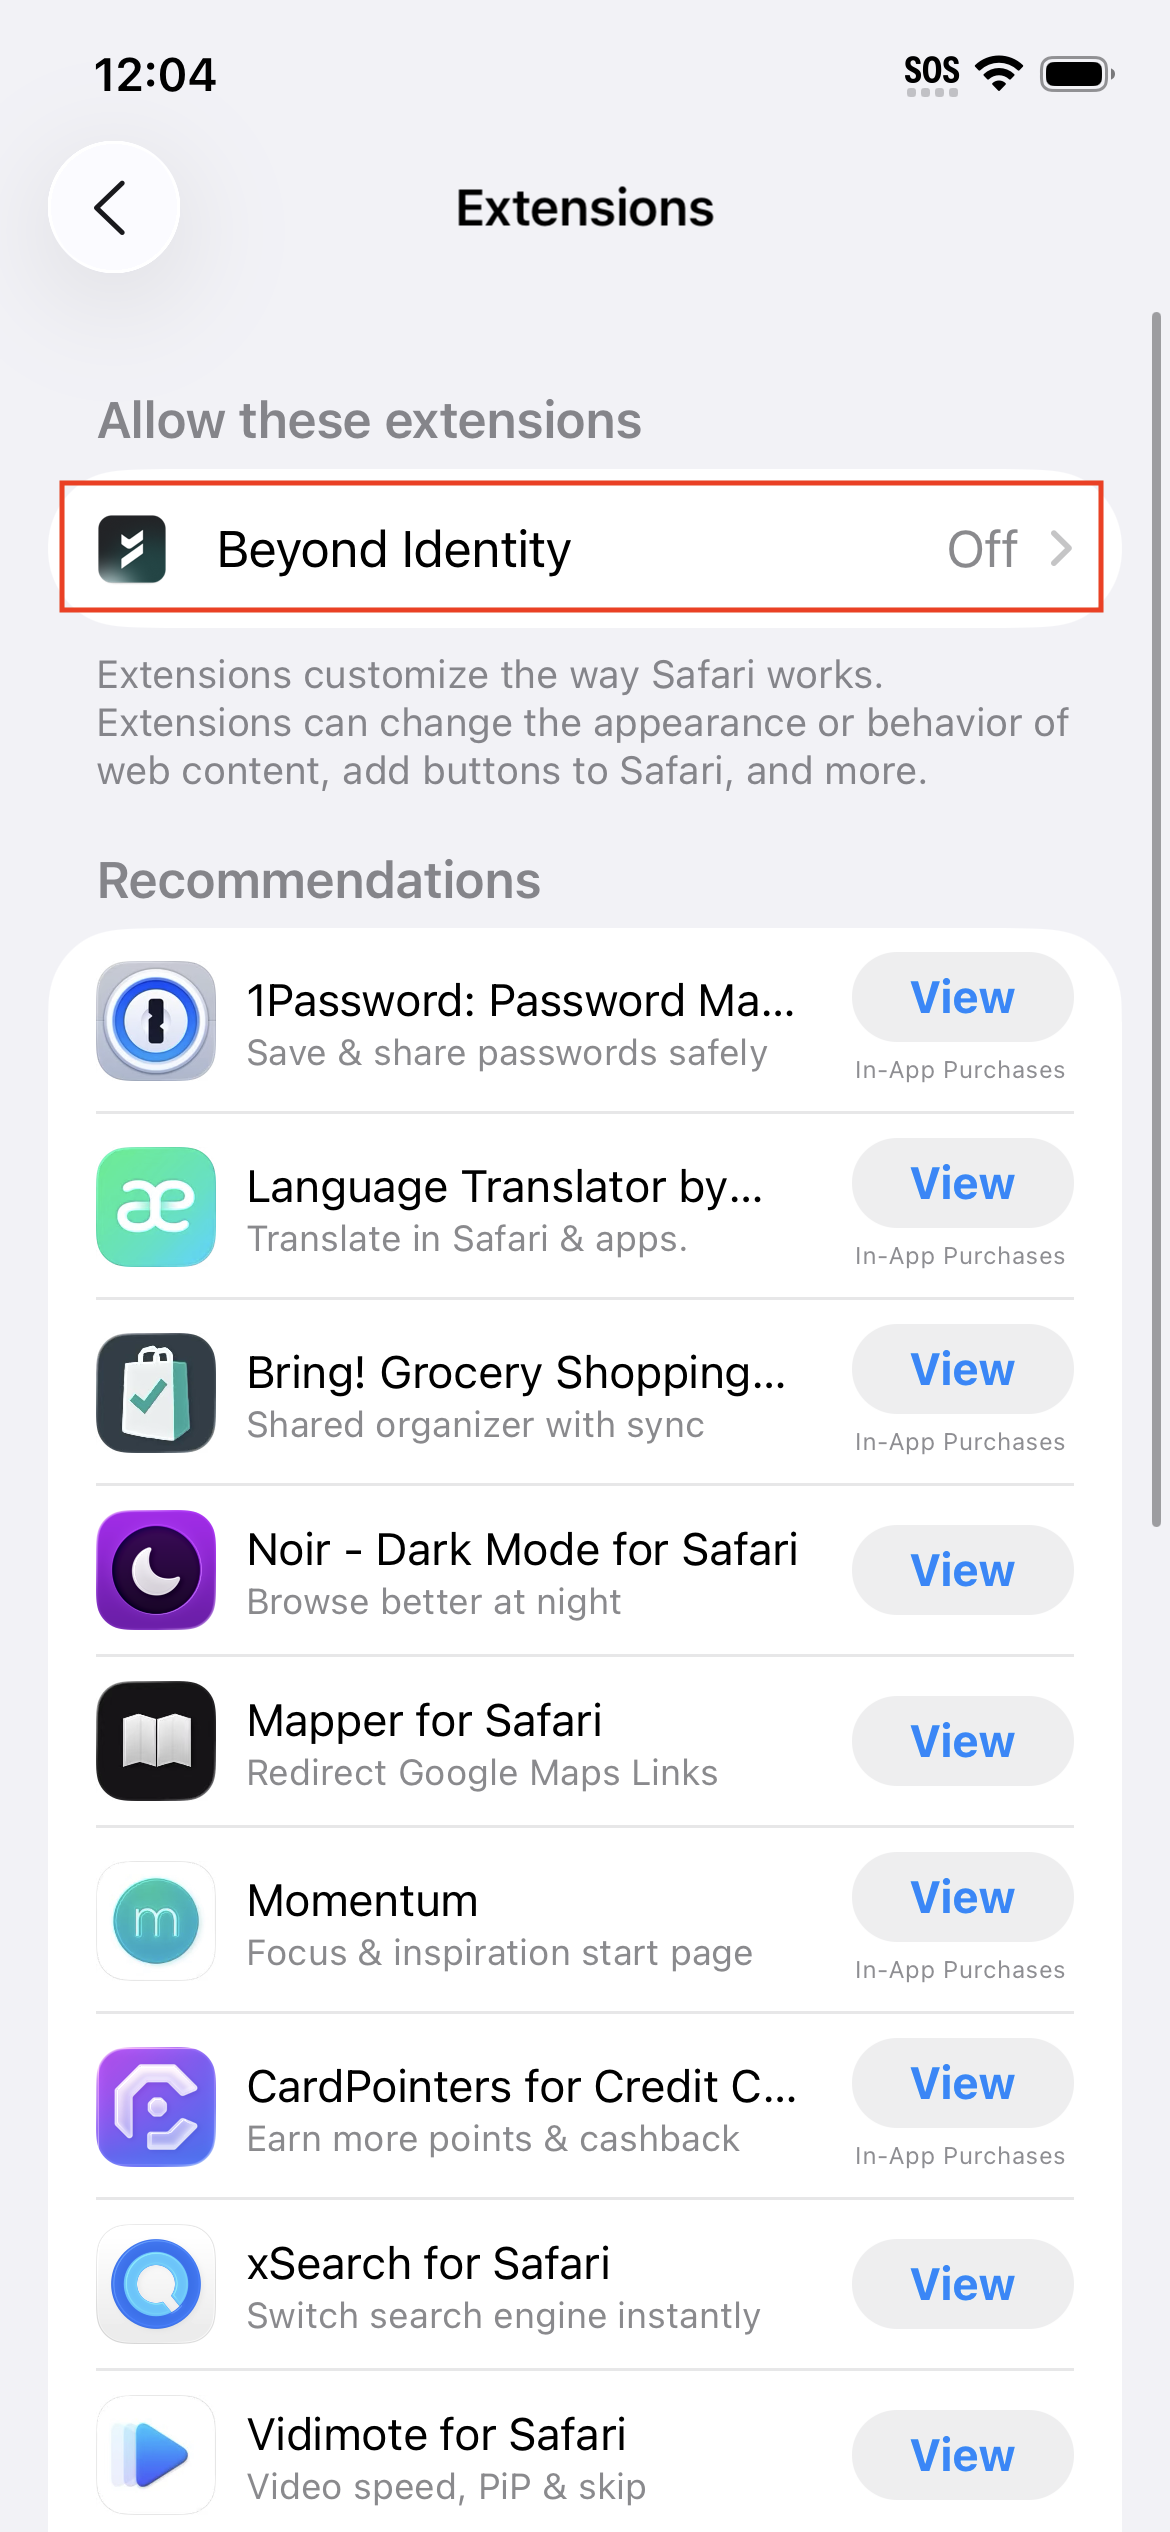
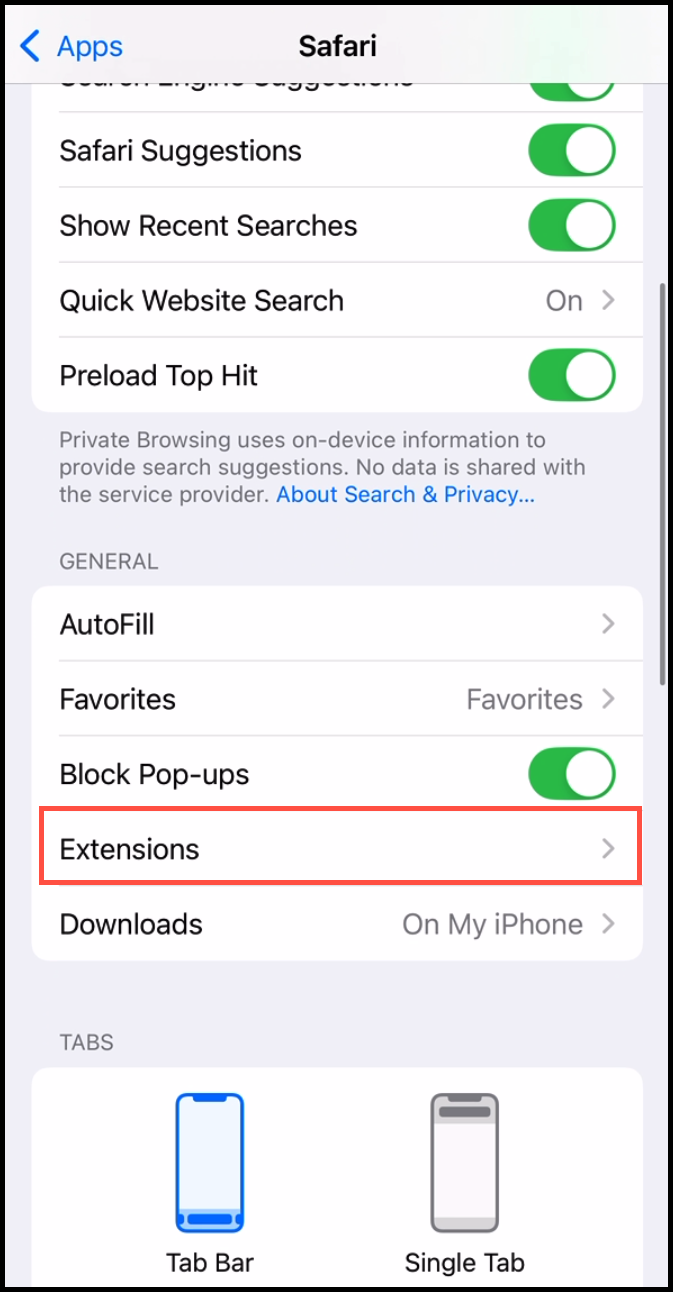
4. Tap Extensions.
5. In the list of Safari extensions, tap Beyond Identity.
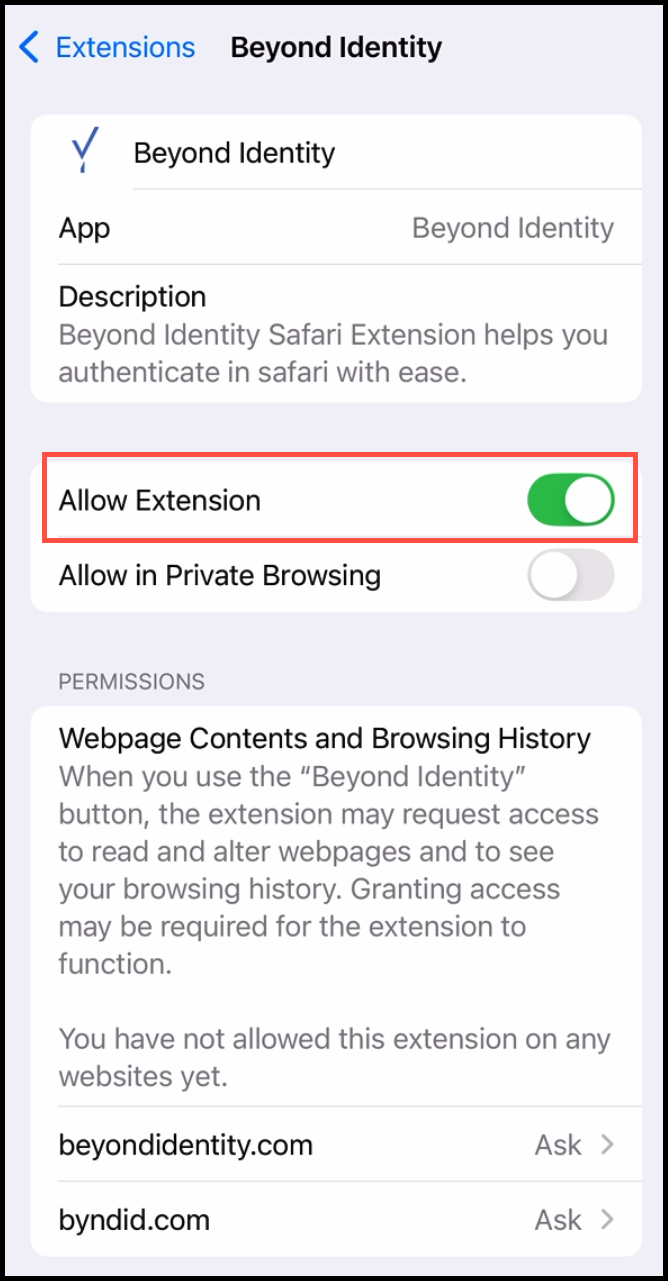
6. Tap the toggle next to Allow Extension to enable the Beyond Identity Safari Extension. 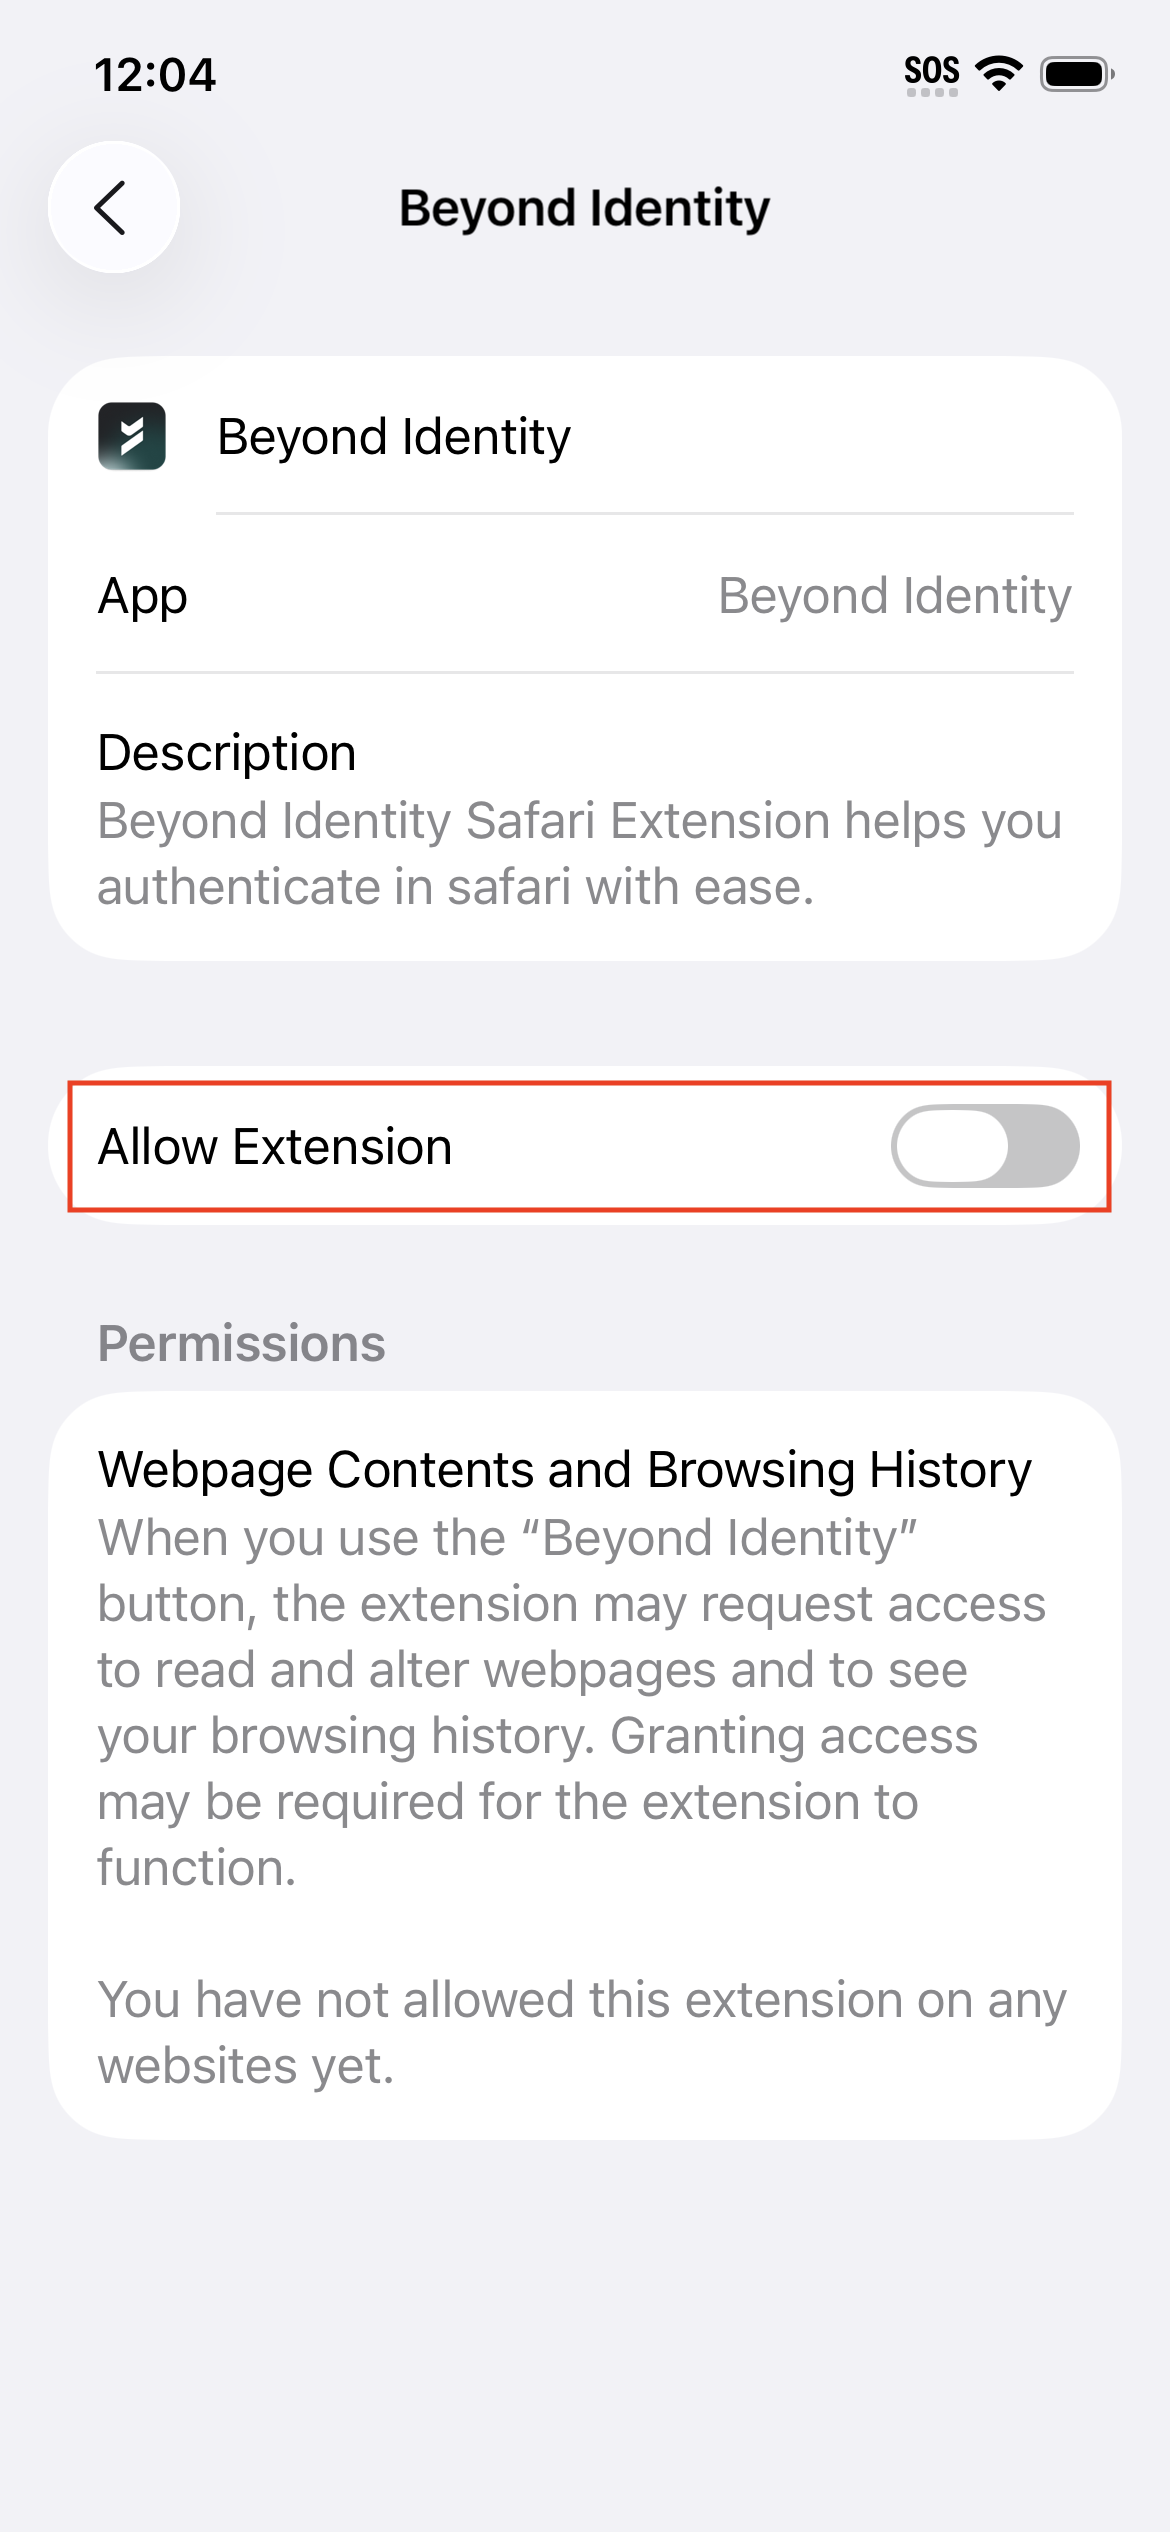
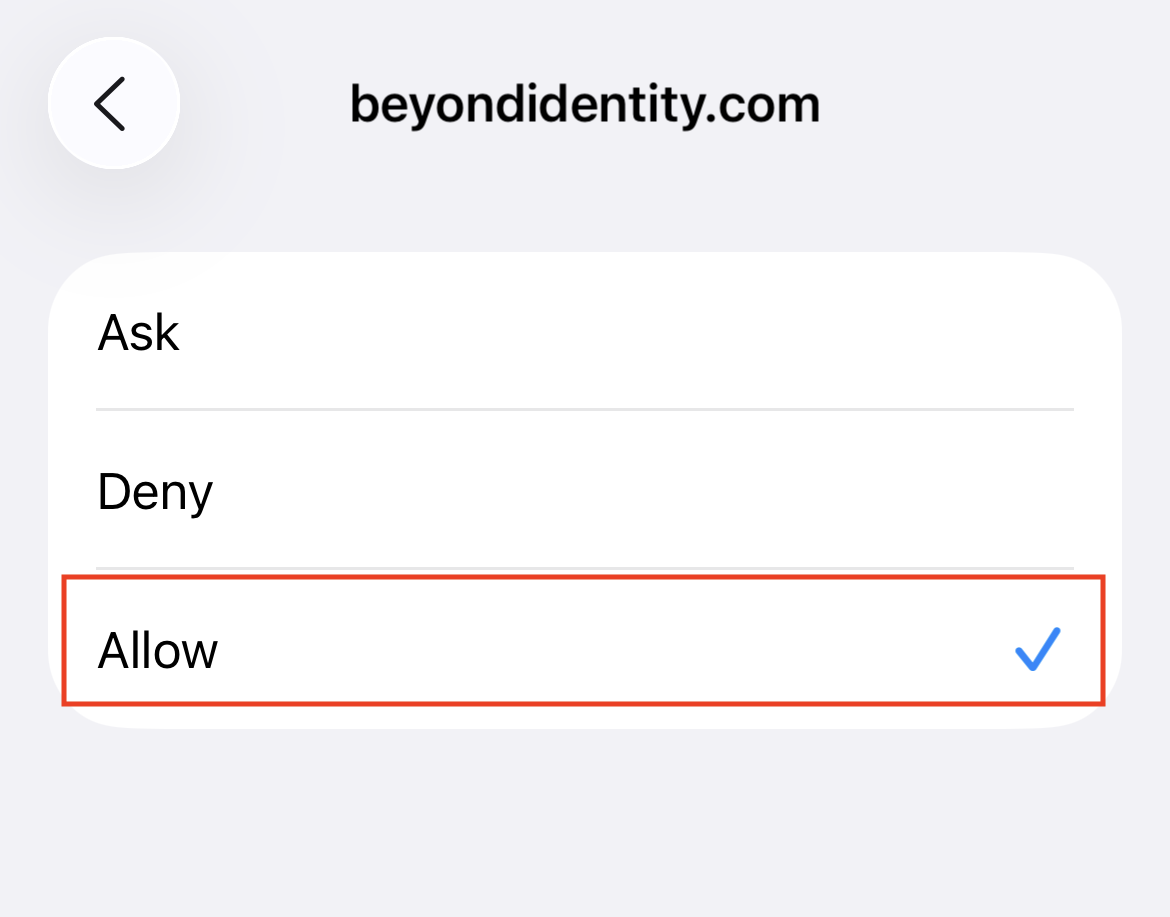
7. On that same screen, under Permissions, tap beyondidentity.com.
.png)
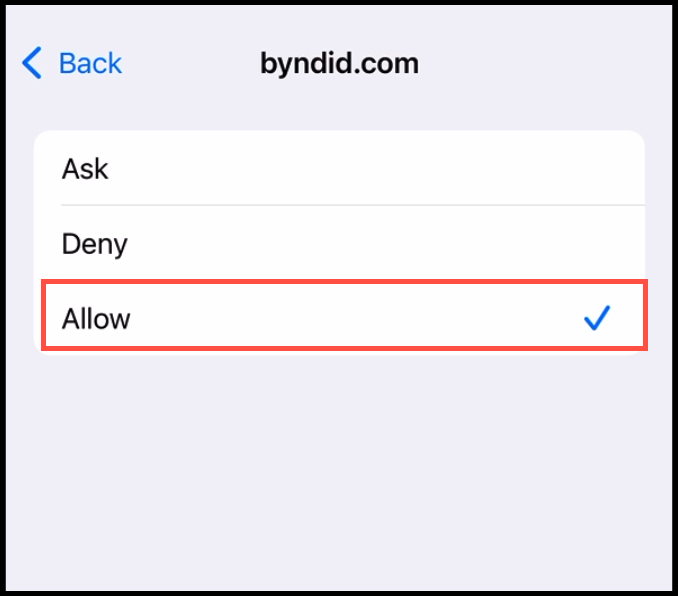
8. Tap Allow.
9. Repeat steps 7 and 8 for byndid.com.
Note: What’s the difference between Ask and Allow?
Ask: Temporarily remembers your login preference for 24 hours. After that, you may start receiving multiple login prompts again, similar to the previous authentication experience.
Allow: Permanently streamlines login by reducing repeated prompts, enabling seamless access to Beyond Identity and SSO applications like Okta or Entra/Azure.
You're all done! You can now authenticate with your Beyond Identity passkey in the Safari browser when accessing protected apps.
For iOS 18
Follow the steps below to configure the Beyond Identity Safari extension on devices running iOS 18.
1. On your iOS device, locate and tap the Settings app.
2. Next, scroll down and tap Apps.
3. In the list of apps, locate and tap Safari.
4. Tap Extensions.
5. In the list of Safari extensions, tap Beyond Identity.
.png)
6. Tap the toggle next to Allow Extension to enable the Beyond Identity Safari Extension.
7. On that same screen, under Permissions, tap byndid.com. .png)
8. Tap Allow.
9. Repeat steps 7 and 8 for beyondidentity.com.
Note: What’s the difference between Ask and Allow?
Ask: Temporarily remembers your login preference for 24 hours. After that, you may start receiving multiple login prompts again, similar to the previous authentication experience.
Allow: Permanently streamlines login by reducing repeated prompts, enabling seamless access to Beyond Identity and SSO applications like Okta or Entra/Azure.
You're all done! You can now authenticate with your Beyond Identity passkey in the Safari browser when accessing protected apps.
You're All Set!
Now that your iOS device is configured, future logins will use an unprompted authentication flow, delivering a faster, seamless experience when accessing your work applications.
Want to test it now?
Open Safari and sign in to the Beyond Identity Admin Console or your SSO provider (such as Okta or Entra/Azure) to experience the streamlined login firsthand.
Having Trouble? Try the Following:
Check that Safari is set as your default browser (see Step 2)
Make sure the Beyond Identity extension is turned ON (see Steps 4 and 5)
Confirm that all Beyond Identity-related URLs are set to “Allow” in the Webpage Contents and Browsing History section (see Step 8)